Reversing the Apocalypse: “Un-ruining” the Mantic 28mm Brick terrain set

I picked up the Mars Attacks! brick ruin terrain boxed set a year or so ago, while I was on my last Fallout kick. The sci-fi kits they put out were pretty cool, and I liked the way those fit together, so I snagged a couple of the MA! ruins boxes on sale from the LGS, hoping they’d fit the good old zeerusty Fallout aesthetic. They were.. not the most impressive. A couple of connectors snapped off while I was doing test fitting, and there were a huge number of “samey” pieces of ruin. That tends to make everything look a little too planned for a crumbling town (in particular, the three identical un-shattered glass doors, and all the identically-busted windows). The clip-together system also leaves huge unsightly gaps between pieces, and glaring holes in the models’ texture that would require filling. Plus they were a garish salmon-orange-pink. So I knew that if I put these together I’d either hate them or have to give up on the modularity that was supposed to be the kit’s selling point.

Instead of doing either, I got annoyed with it in the planning stage and stashed it in the back of my closet with the rest of my unloved but usable gaming crap.

Today I’ve been inspired by the work of the gent over on Tabletop Terrain to give my 20th-C brick a second look (he’s got a couple of really cool posts through that link showing his own work on it). He fixed the gapping problems and the clip-holes quite handily. As I said, however, the biggest thing that bugged me personally was the uniformity of the busted bits, along with how small most of the pieces are. Some are barely big enough to make a blasted corner sticking up out of the rubble, and only have 1-2 clip holes. That makes building walls and linear terrain much harder. Plus, I want a couple of vaguely intact buildings to fuck about in. The best part about Necromunda and Mordheim was always the massive, multi-level terrainscape; I want to get some of that feel with my own This is Not a Test tables. I know Mantic offers actual un-ruined sets, but most of them don’t actually give me anything over what I already have. In particular, the roof tiles look shit and they have no models with plain, open windows – everything’s a thin layer of tough, orange plastic I’d have to saw out anyway. I might pick up their Convenience Store for the windows, but really their setup is pretty janky and this is more about salvaging and getting the most out of what I have. Kinda appropriate for a post-apocalyptic project, if you think about it..

So I set about restoring what bits I have and planning out new ones – the roofs are going to have to wait for a bit.

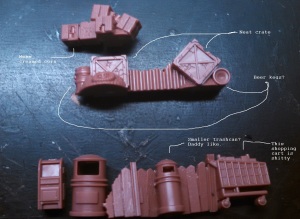
One of the first things I noticed was that the “Accessories” sprue has some pretty cool bits on it that aren’t actually on any of the buildings Mantic offers – a different dustbin, beer kegs, a better-looking paneled door – so I plan to might wind up separating a few of those off and repairing/recasting them for scatter terrain. That door is >definitely< going under rubber, although I’m going to have to make it as a “face” mold since the other side is covered by crates and reinforcements.

accessories-linear-terrain-annotated

Annotated to show some of the nifty salvageable bits here

accessories-cool-door-in-barricade

Almost the same size, and you can’t tell me this isn’t cooler…

The park benches are too difficult to cast, and I can make my own, better-looking ones more quickly and cheaply with coffee stirrers and wire anyway, but the road signs and 50s-style lamps are badass.

I also did a basic repair on the main panel.

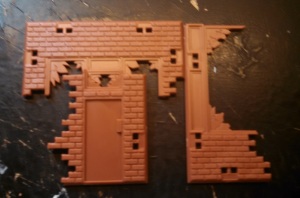
I had the sneaking suspicion that one of the smaller “ruin” pieces would match up fairly closely to the missing chunks of the largest panel. None of them did exactly, but a couple were pretty close. This was the best fit.
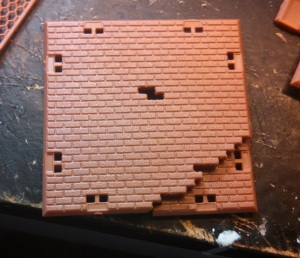
main-panel-tracing
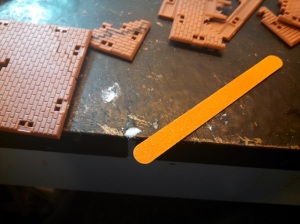
I traced the outline of the larger wall on it with a sharpie and got to work with the ol’ razor saw (this stuff is a little too stiff to cut with the X-acto, although my heavy boxcutter is decent for trimming), and an emery board.
main-panel-traced

These things are the shit, kids. $1.50 for fifteen, and they're wide, straight, flat, and flexible.

These things are the shit, kids. $1.50 for fifteen, and they’re wide, straight, flat, and flexible.

Anyway, I sanded until the model hit a decent temporary fit, then clamped it into a pair of other walls as an alignment jig and sanded until it fit cleanly and without real effort before I glued it. I also lightly sanded the surface of the piece – like a lot of these hard-plastic wargaming models, it warped slightly while cooling and I want the recasts to be as clean as possible.
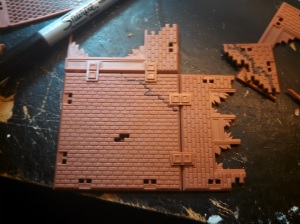
main-panel-fit-and-glueNext up is making a quick-and-dirty epoxy mold to transfer and repair the brick texture from the other side and replace the two bricks in the middle.

After that I have a couple of ideas, but given how shitty this plastic is to work with I think I may just cast up quick-and-shitty molds of the main unique wall sections instead of building off of what I have.

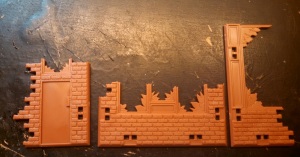
Said larger bits of ruin

Said larger bits of ruin

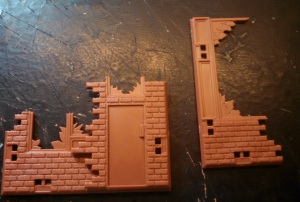
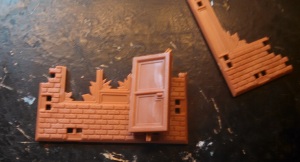
One of the cooler things is that the door piece aligns in a couple of different ways with the window-walls. With proper castings and a little elbow grease these ought to break up a lot of the monotony of the set.

Side alignment with two full-height windows

Side alignment with two full-height windows

Side alignment with the paneled door

Side alignment with the paneled door

Center alignment with two small windows above the door.

Center alignment with two small windows above the door.

The bay window will be kind of a bitch, but at least I can get my brownstone on in a reasonably attractive manner. Floors will be super easy, just joisted coffee stirrers with a little filler on top, and I think can get away with using the floor separators as a frame to hold on upper levels since I’m not going to be using the Mantic clips to hold the structures together.  Given my ongoing mold hold-out rates, this ought to give me enough casts for a couple reasonably-sized buildings to play in and beat the shit out of in a slightly less-regular manner than they probably intended.

Sculpting again – Robotech Tactics

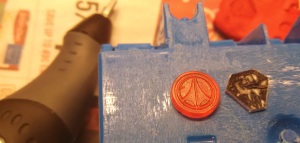
I was annoyed by the lack of Malcontent command chips, so I started sculpting my own this afternoon. So far, I’ve got about 20-30 minutes of work into it. I freehanded the base shape onto paper using a UEDF chip as a size comparison, sketched the design onto it loosely with a Micron .005, and then freehanded from that with my engraver (picked on up free from one of the Makerspace guys who was ditching it after getting a laser engraver).

After cutting the base chip and freehanding the Malcontent logo on there with the Dremel - ~5m.

After cutting the base chip and freehanding the Malcontent logo on there with the Dremel – ~5m.

Next, I mixed a tiny amount of Green Stuff and worked it onto the design.
Step three - 10 MinTook about 10 minutes so far. I’m pretty proud of the detail on the Valkyrie tail, especially since it’s less than 1mm tall.

Now I gotta wait until after my volunteering shift at the local film society to throw another layer of GS on there, but it’s already looking damned good. I’m probably gonna be in shape to drop rubber on these by the time I can afford to buy more. Eventual plan is to cast off a pair of masters, sand the backs down slightly, and then glue them together and install a thin rim instead of trying to do this thing double-sided. All told, should take me about an hour’s actual work to get a mold going, maybe another 40 minutes total to set up a full mass-production rig.
Not, of course, that I’d MP these. But Jesus, Palladium, it’d take a pro sculptor less than a fucking day to set this up and GHQ could be pumping them out by the thousands in less than a week. Hell, you already have masters for the UEDF and Zent chips, put them under some rubber and give us enough to actually play with…

yet another quick update.

Nothing super big going on for the last two days, just a lot of micro-progress. Still, I’m trying to publish at least once every two days right now, so here ya go.

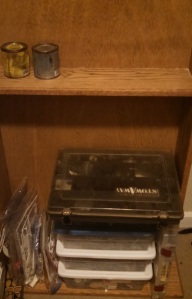
As far as the ongoing cleanup goes, I sorted out the last of my terrain and materials into boxes, cleaning out and consolidating my three unsorted boxes of minis into one coherent whole. Still need another three to four plastic shoeboxes to finish storing everything (I need to sort the Mars Attacks suburbs and generic post-apoc terrain into its own box and clear out the big shoebox currently full of modular Necromunda and Russian industrial terrain so I can put my Space Hulk set into it). Bases are sorted for now as well, but I need to replace or repair the current Plamo case they’re in – the hinges on the lid shattered from UV degradation.

Less impressive-looking than perhaps it is. Top to bottom: Bases, Fantasy, Post-apoc, Warzone, Light Vehicles and Mecha. Gundams to the left, IG and moderns to the right.

Less impressive-looking than perhaps it is. Top to bottom: Bases, Fantasy, Post-apoc, Warzone, Light Vehicles and Mecha. Gundams to the left, IG and moderns to the right.

On the modeling front, I cleaned up, converted, and posed a Stalker, Wasp, and two RRPGT Valkyries, and did a photoshoot for my long-delayed review of the Destroid Tomahawk (which I need to finish now so that I can start on a Secret Project [tm]).

no soup for you

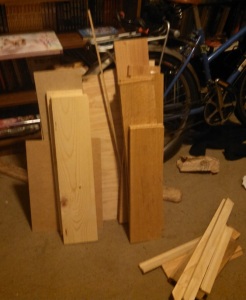
Finally, I’ve gotten the last bits of wood I need to do the paint shelf and finish restoring a bookcase I salvaged last month, so tomorrow’s gonna be a carpentry day.

About to be a couple of far more-impressive things.

About to be a couple of far more-impressive things.

Then I’m having guests for dinner. Should be a lot of fun.

Pirate conversions, and more Black Widow work (TotBWC, Battletech)

So, I’ve been much more productive these last couple of months than usual. Part of it’s getting on the right meds for a change, part of it’s completing the better part of a year’s worth of therapy for my ADHD. Now I’ve got time to work on something other than fixing my headspace, I’ve been working my ass off on my project backlogs. It hasn’t really made it onto the blog, since a lot of my projects have just been aimed at unfucking my house or otherwise not hobby-related, and I haven’t been in the mood to write for a while either. But now it’s too hot for carpentry, so back to the keyboard we go.

Right now I’m working on my massive post queue; I kept starting posts and then abandoning them to the ether after twenty minutes over the last year or so, and now I’m going back and finishing them – or adding on the stuff that I quit writing to do and never got done.

This is one of those posts – a selection of the ‘Mechs I converted/prepped/repaired in the course of three days back in June. I had to pull a couple back for QC (like the Bounty Hunter), but it was a lot of fun.

Overall production

Left to right, front to back:
Front row: SHD-2D “Vang” custom Shadow Hawk (This one is a little surprise for the mission “Leave No Survivors“; check below the break for the tech readout. It’s a beast), Stinger, Crusader, converted GRF-1S “Steiner”.
Second Row: Stinger, converted Wasp (left-handed, with a Recon Camera, two Vehicular Grenade Launchers, and a Small Laser replacing the missile system), an ICE Thunderbolt (modified from Steve’s design in 3063, see below the cut), a dressed-up Griffin with a Dougram Bushmaster’s linear gun, and a stock WHM-6R for the Santander Killers.
Third Row: two stock Wolverines, plus a Shadow Hawk converted to a Wolverine standard. See below for the parts breakdown. After that there’s another upgunned Griffin and a reposed and cut-down Stalker for the pirates (I’m using the stats for the lightened 80-tonner with it).

IMG_20160605_213303_957Detail pics:
Here’s some slightly better shots of the four who do me proudest.
SHD-2D “Vang”: Added another Dougram light Linear gun (the ML on the Shadow Hawk) from my gashapon collection, and put on a light SRM from the same source. The over-the-shoulder gun is the Large Laser I took from the Thunderbolt, mounted on a small part from a MW Clix mini. I recarved the area next to the head to remove the original grenade pack and plugged the SRM holes in its “collarbone”.

SHD-2 “NISE* Wolverine”: So, I’ve always disliked the way the Wolverine looks (heresy, I know. Shut up.). I scored a 3e plastic Shad on Ebay for $1 since the backpack gun was damaged and the laser had broken off. And I figured “Why the hell not? Someone’s gotta get a Command ‘Mech out of this, and pirates seem like the folks to do it”. First I rebarreled the arm laser with a bit of wire and some Green Stuff, then added a spare Command Destroid pack to the back in place of the AC. I mated the AC receiver to a barrel cut from scrap from a WH40 Basilisk fighting platform railing and a short magazine made from plasticard, then mounted it under the fore-arm. It’s hard to see, but there’s a small finger guard attached to the hand-grip. The missile rack is a carefully re-cut pair of SRMs from a JES-1 carrier. I also filed off the VGL mount on this one, but left the gap clear for the backpack SRM to shoot through.
This is going to be the leader for Recce lance of 2 Coy, Santander’s Killers.
*From the Gundam fandom. Refers to a “mocked up” or faked version of a ‘Mech using another’s chassis; the original NISE Gundam used a GM chassis.

TDR-6FX1: I like diesel Thuds. You like Diesel Thuds. We all like ’em. So this was an easy rebuild choice for another E-Bay rescue Thud. The shoulder mount is a pair of Dougram Linear guns, cut down and reinforced, with a Locust-like arm pod made from plasticard and a plastic rod. The arm got a Wolverine hand-gun from a WVR-6M conversion I did ages ago for a buyer, plus a shield from an MS-06F Zaku II that I had converted to a Zaku I. The smokestacks are made from sprues, and I sculpted a simple engine and heat sink into the back (as well as the laser pack space in the front). Given that these things are supposed to be like forty years old by the late Jihad, I busted her up a little bit too.

GRF-1S: This is a simple up-gunning, using components from a Roundfacer “Korchima Special” as well as a RRPGT Defender radome and some cord.First I cut away the shitter guns that come with the vinyl 3e minis, then carefully sawed in the detail on the legs and re-carved/sculpted the shoulder and side of the head. I added a small “reactor pack” on the back using a casting taken from a AAA battery, and wired it up to a recast Roundfacer gun. I tried a couple different components to dress up the other side of the pack, but the radome just seemed to fit so well. On the other side, I’ve mounted a smaller missile launcher, taken from a Dougram gashapon. Oddly, given how much time and effort I sunk into the others this one is still my favorite-looking.


The Future:

Painting to come once I finish allocating to the various forces in the book, though I already have homes for the Stalker, “NISE” Wolverine (both to the Killers), Thud (Canopian militia), Stingers, Vang’s SHD (Draconis March Militia), and Griffins (One each to the Donegal Guards, Killers, and Black Widows). On the shelf I’ve got some converted Archers, Pixies, the Bounty Hunter (3015), a few Valks, and the Dougram gashapon to fiddle with, plus a fuckton of vees.

Record sheets:
Below the cut, with some quick commentary on the design process and ideas behind them.
(more…)

Airbase Toblerone: Part one (Battletech, Robotech Tactics)

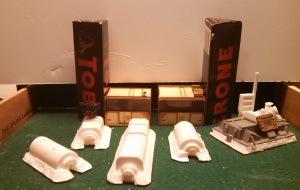
As promised (two weeks ago -_-;;) here’s some WiP shots of the terrain I’ve been working on. I got a fire lit back under me while working in the local makerspace with one of the guys on some really basic foam-cork stuff, and started back up on one of my long-term stalled projects; a fully-fleshed out 6mm Drop Port and/or HPG station for Battletech and Robotech Tactics. The wall and command bunker entrance here come from that session.

Ha Shi Dao complex front

“But what’s the ‘Mech, Doc?” Come back tomorrow for more..

IMG_20160605_213655_604 They’re loosely based on the Hai Shi Dao defense emplacements from Steel Battalion (Christ I love that game), and depicted as shelled and partially knocked-out. The intact emplacement on the left in the bottom pic is going to be getting a twin-AC/10 emplacement later. I really wanted to get a kind of “churned and barraged” feel, so I referenced a couple paintings of WWI battlefields for the ground colors on the main emplacement. You can also see a partly-overgrown crater with bits of a tree in the foreground of the piece.

Airbase step 2

For the main buildings, I rooted out one of my old ERTL Space Shuttle kits for the EuroLab components and the  GPS satellite payloads (I’m converting the Shuttles themselves into mini-Leopards, but that’s another post) to make the Quonset huts and barracks. The Command Center is a fighting deck from a Warhammer 40k Basilisk that I’d converted to a direct-fire SP gun, along with a few resin scrap components and a Cardassian comm screen from an old Star Trek figure. All are mounted on 1/8″ foamcore. The beveling was done roughly with a sharp hobby knife.
The gate towers are each made from half a Toblerone package (which I’ve been wanting to do for ages), scrap from the “Storage Units” that I got from the Burn In Designs kickstarter as ‘Mech hangars, and bits from a trashed Mechwarrior DA figure I used for parts on an N-scale kitbash. The bay windows are simply cut from mini blisters. These are still waiting on internal floors for the third deck and some catwalks against the back wall, as well as armament for the towers. I’m focusing on the plastic buildings at the moment, so I can get as much as possible put away before doing any more heavy conversion lifting.

Airbase progress 10 Aug 2016Current status after base-coating.
I sealed the foamcore with PVA glue, then added sand and flocking with another couple coats of glue before spray-coating. No melting, so I must have done it well enough..
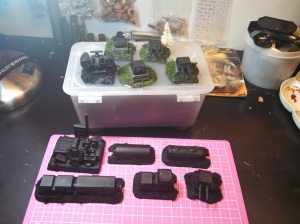
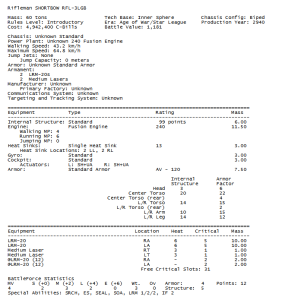
You may remember the turrets here from my casting tutorials (link to first post here). I’ve since converted a few of them to laser and missile turrets, as well as a massive mini-missile rack and a “mechaturm” based on the old German Panzerturms. The turret torso is from one of my own “Shortbow” custom FrankenMechs. The readout below is just for the “factory” option, since making a Franken proper is a massive pain in the ass.

Basically just slap an LRM-20 in each arm instead of those shitter ACs and you get a startlingly competent back-line fire-support unit.

Basically just slap an LRM-20 in each arm instead of those shitter ACs and you get a startlingly competent back-line fire-support unit. Enough sinks to fight, ammo for days, and no armor to speak of. It’s perfect!


Remaining for this project: Doll up the Burn In Designs modules and the Toblerone Towers, prep the power center and fuel farm (I have the parts, just haven’t put them together) and make a blast shield for droppers.

Desk Organization System (DiY)

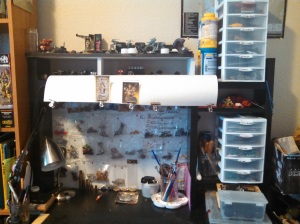
IMG_20160810_131249_686I wound up putting a lot of projects on hold over the last couple weeks so I could do this. I’ve put together a new top shelf for my desk to expand my storage space, and I’m also working on a paint rack to free up one of my toolboxes for all of my new gear. I’ve been talking shit about fixing the desk for over two years, and the overwhelming clutter has been holding me back from doing a lot of other stuff. It feels damned good to have this done.
Below the fold, I talk about the tools and equipment I used to make the shelf, but all told this cost me almost nothing and presents a substantial improvement over the absolute wreck I had before.

(more…)

Fast, cheap Flightpath proxy dials (Attack Wing, X-Wing)

So, the biggest and most irritating barrier to making your own ships or proxying in the Flightpath system is the maneuver dials. I have a whole shitload of ships that will likely never get a release, not to mention a bunch of Clix-Trek ships I bought for parts or other wargames. So, as I was sculpting my 1:1200 K’Vort Bird of prey this evening, my eye fell on a sad, abandoned Clix-trek base, and something clicked into place (if you’ll pardon the pun)..

Note: this tutorial does not include making “ship chips”/bases, nor making custom cards. Check the Boardgamegeek or afewmaneuvers sites for that. And for the love of pants, don’t try to drag these into an OP event or some such stupid shit.

Warning: This involves sharp things. You could get hurt. Be careful. Now you can’t sue. Have a nice day.

Materials:
One two-inch “Clix” dial (needs to be the big ones with the secondary dial boxes, which I know they made for Mechwarrior and Crimson Skies Clix). Sadly, Clix-Trek bases only have 12 “slots” for maneuvers, whereas the large-format ones have the necessary 18. You can pick up minis from the Mechwarrior game for about a buck.
Colored paper (I used some 30-bond 3×5 cards I had lying around, since they came in faction colors).
Red, white or silver, black, and green pens. It helps if  the black is a small fiber-tipped micro pen. If you’re using black paper, you >must< use paint pens for this.
Craft knife
Compass cutter (I got mine from Daiso for $1.50)
Sandpaper or a sanding sponge.
Roll of cheapy cellophane tape.

Steps below the cut.
(more…)

TotBWC project update

Made a little more progress, now that I’ve got enough wherewithal to stay focused on one thing for more than 5 minutes. I’m still not even up to standing for more than 5 minutes, let alone the walk to Gabi’s from the bus stop, so live-fire tests at the LGS have been postponed (again..). Going to test out a couple scenarios with my brother while he’s here, though.

Here are the current revised force lists for the scenarios listed below (I’m still writing them up in the new scenario style, which will be coming up shortly. I hope.)
Scenarios with simple map/rule revisions:
“Leave No Survivors”
“Ghost Unit”
“Last Line of Defense”
(Hoff scenario IV)
(The remaining Hoff scenarios are getting repurposed into a Chaos Campaign tree)

“The Lady and the Tiger”
Special Rules: The weather is a Heavy Snowfall, increasing the difficulty of all piloting and gunnery rolls by 1. All ‘Mechs sink an additional point of heat. Starting on Turn 15, piloting skill rolls increase by 1, and all hexes cost +1 MP due to snow buildup; in addition, all units sink an additional point of heat each turn. All Water hexes are solid Ice. Forced Withdrawal is in effect.

Defender: The Black Widow Company (Total BV: Just shy of 16,000)
(Roll 1d6 on turn 4; on a 1-3, the Fire lance arrives: on a 4-6, the Scout lance. The remaining Lance arrives on Turn 7)
The Black Widow Command Lance must deploy within 4 hexes of the center of their Home Edge; all of their reinforcements enter from the opposite edge (flanking units returning to envelop the Killers).

Attacker: Santander’s Killers, Tregarth’s Company (Total BV: 11,726)
Command Lance: Cpt. Tregarth: Untouched WHM-6R*, Veteran Skills. TDR-5S (18 RT armor, 12 sinks, 7 CT(r) armor) (Veteran skills). WVR-6R (15 armor, LT). Warrior Larsen: GRF-1N (costs 2MP/hexside to turn)
Scout Lance: PHX-1 * (Double all movement heat, 5 HD armor, Veteran), STG-3R (gyro hit), STG-3R (Heat sinks reduced to 8), LCT-1V (heat sinks reduced to 6)
Fire Lance: VLK-QA* (Veteran, malfing Medium Laser), GRF-1N (10 LRM-10 ammo left, down to 10 sinks), SHD-2D (Gunnery 6 due to FCS damage), PNT-9R (all rear armor reduced to 2)
The Killers are in a search formation, struggling to overcome the blizzard, and all lance members must deploy within 2 hexes of their lance leader (marked with a * above). All lance leaders must be within 3 hexes of the center hex(es) of the map. Their Home Edge lies opposite to the Widow’s

Playtest notes:
I increased the delay on the reinforcements to give the Killers a little more of a chance; they wind up out-BV’d in the original scenario when half of the Widow’s Scout Lance walks onto the board, and basically outnumbered 2:1 by turn 5. It’s straight-up not enough time to even engage, let alone do any damage, for such a light force. With an objective of “kill everything, accept no substitutes”, it’s disgustingly unfair.
The overall Killers force was drastically increased; I like the paint scheme, so this is an excuse to make a company of pirates with a fairly reasonable force. I’m also going to do a personality model for the Death’s Head Raiders Victor mentioned in 3025.
I’ve run this one twice so far in its current incarnation. Still working on the map layout, but the Widow player can still win handily IF they use the weather to their advantage. While the Killers have more jumping units, the Widows have better gunnery on average and far more close-combat firepower. The cold weather at least partially compensates for the ratty ‘Mechs on the Killer’s side, and it is possible to inflict very serious damage on the Widows very quickly if they get sloppy. In particular, if Nasty K and MacLaren overheat too soon, they can be coursed and slaughtered before the Widow’s reinforcements arrive. The Killers’ player, however, must be extremely careful not to let his faster units string out and allow his defeat in detail. Finally, loading Infernos into the Shadow Hawk or Wolverine can allow some interesting tactics with Mud. Or the iced-over water hexes on the map…

“The Bounty Hunter”
Stillin the early testing stage; the assassination objectives make this one hilarious, but the Haseks had a dangerous BV advantage in the original scenario. On my first play-through, however, the Haseks literally lost 2 of their lights on turn 1 to breach checks and another to a failed PSR, badly unbalancing the scenario. I’m thinking of making some of the Hasek warriors have at least one Veteran skill, especially the Valk pilots hiding in the pools on his lawn – who will desperately need higher piloting skills with the way water works now compared to the BattleDroids rules. I may also down-weight some of the bodyguard lance.
This requires a custom map, which I’ll upload in its final form; this winds up being a clusterfuck pretty fast on the original 2×1 map. Especially with the walls and other elements restricting mobility.
TRO 3025 notes that the Haseks have “replaced all ‘Mechs in their Light and Fire lances” with Valkyries. With that in mind, the current test force:
The Bounty Hunter: MAD-BH’15 (Elite), SHD-2H, SHD-2H.  (6428 BV assuming elite/vet/vet)
Sixth Syrtis Fusiliers: (Duke Hasek’s personal Guard) [8,947 BV]
Command lance: MAD-3D or WHM-6D (The funnier option is the MAD, since it’s Michael’s personal ride), CRD-3D, RFL-3N, RFL-4D. [5737 BV, assuming 3/3 MAD-3D or WHM-6D – both have essentially identical BVs]
Second Lance: PHX-1, 3x VLK-QA (3,210 BV) or 4x VLK-QA [2892 BV]

This leaves “Lady Sings the Blues”, “Queen’s Gambit”, “Scavenger Hunt”, “Spider Trap”, “Dawn Patrol”, “Fog of War”, and “Lady’s Man”.

I have made an art (project)

IMG_20131204_031023_332 Glue’s still setting but she looks darned good if I say so myself. Will put the final touches on it tomorrow morning, and case the other two text blocks I’ve finished. With any luck, this might be my second project to actually break even!
Busy Busy Binder (project)

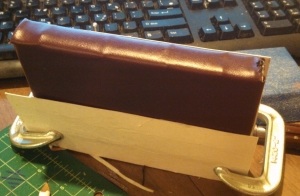
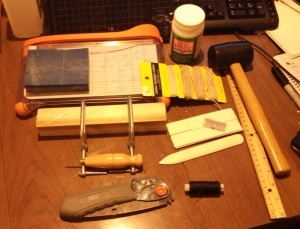
Today I rigged up a bookbinding press and glued my second text block ever. As usual, I’ll be doing a more detailed “how-to” once I get the process down better. I’m testing several methods, focusing on 15th-16th century binding, as part of the folio project I mentioned earlier.IMG_20131202_170323_704Items (costs included), clockwise from upper left, top to bottom:
3m Sanding Sponge, 400 grit ($2.99) – I use this for modeling and various other things as well.
Fiskars 5″x9″ guillotine paper trimmer, ($10 on sale at Michaels)
Outdoor-rated Mod-Podge ($6.50, same)
Jute twine, various weights, and waxed leather thread [the black spool at the bottom] ($5 all told, left over from a leatherworking project)
Rubber mallet, 2# ($1.5 at Daiso Japan, a hundred-yen store in Seattle)
Ruler (45 c)
Standard safety razor blade ($1/pkg 5, Ace hardware)
Linen bias tape ($2, Jo-Ann’s, sale)
Bone Folder ($6, Dick Blick)
Folding Japanese-style saw ($9, Home Depot, bought for camping) note: Japanese saws cut on both the draw and push stroke – this isn’t just me being a weeaboo.
Awl ($1.50, another leftover leatherworking tool from Daiso)
Ghetto bookbinding press  – 2x  2″x1″ C clamps (local hardware store, $3.50 each) and a couple 9″x1″x1/2″ strips of maple, which were left over from a prop project. I’ll give it feet later.

This setup lets me bind books roughly B4-6 and A4-6, which suits me fine. Total cost is ~$50, which means 5 books at $10 to break even. Should be doable in theory, but the craft fair is in 2 days. Wheeee!

A Productive Day (Battletech, Sculpting WiP, rust reference photos)

Well, after fiddling with that pen, I felt the need for some sculpting. My long-running Longbow/Spartan project is one layer closer to completion, and I’ve begun taking a miscast Hunchback from my Battletech Intro Boxed Set and turning it into a “Swayback” variant – in this case, the twin LRM-10/quint Medium Laser HBK-4J. Click to embiggen all photos – the knife shots below are quite large for reference purposesLongbow WiP 08 Oct 2013 - Hunchback
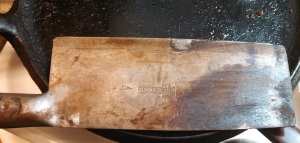
Then I went out to make dinner. Turns out a bottle of vinegar-based salad dressing had overturned onto my carbon-steel meat cleaver.
You may know what acid does when exposed to good steel.
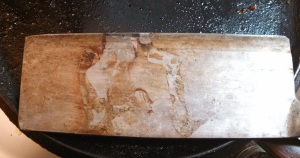
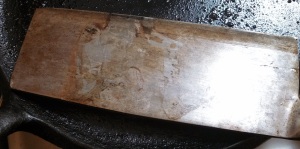
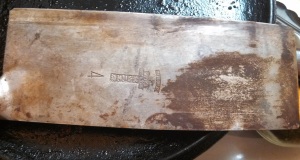
I had the presence of mind to photograph it, as this is pretty much what a good bloodstain that’s been ignored will do to a sword/cleaver/knife. Commentary in the captions

Left side of blade, with a quick wipe to remove the pooled vinegar.

Left side of blade, with a quick wipe to remove the pooled vinegar.

Note the grainy texture of the corrosion on the right side, and the ring of corrosion around a nearly untouched center at the top of the blade (if there’s no contact with oxygen, the blade can’t rust – that’s why you oil weapons)

Right side, again after a quick wipe

Right side, again after a quick wipe

This side didn’t get it nearly as bad. Again, though, notice the texturing and contours of the corrosion around the clean areas of the blade.
IMG_20131008_191945_515IMG_20131008_191936_898

Here’s the blade after a scrub with paper towels, but before I scoured and re-seasoned it. This is what hastily wiped-off blood would look like if you let it sit in a corner somewhere. Also, note the color changes as the oil scrub absorbed the majority of the “fresher” light orange oxides on the damaged parts of the blade. The corrosion’s almost black underneath, building though thicker browns to a powdery, newer orange.

Battletech Projects Update

I’ve been offline but not idle. The cough is still with me (whee) but the rest of it’s died back a lot.
First, the Longbow/Phalanx is progressing nicely. The legs are finished, I’m starting on the arms and finishing the last bits of the body (heat sinks, collar, and the drop-out reactor in the back of the torso). Click to embiggen the photos. Note that the spotlight is just blu-tacked on, I’ve got to build the mount for it and add the antennas.
Lonbow bash sculpt progress 6-5

I’ve resumed the Diesel Thunderbolt from TRO 3063 (see below).Fucking Canopians pt deuxIt’s very much my favorite ‘Mech from the project, both in appearance and sheer amusement value. I broke off the sculpt because I couldn’t get the armor plates right: now that I have the right tools, it should go much faster. I’m basing mine off an Unseen Thud, instead of the Jihad-era Reseen we used in the book art.

I’m insanely happy about this last one – I got permission from Alex Iglesias to sculpt up some of my favorite designs of his, the “unfucked protomechs”. He occasionally posts original designs and comics on /tg/, and these.. well, judge for yourself.
1360369596916
I’m making the Roc for sure, probably with swappable weapon mounts, and I’m seriously considering several others. I need to hone my skills more, but I finally have the tools and equipment. It’ll be nice for my Spirits to have the tools I want and not the horrid Chaffee designs.

Bad Resin! No Biscuit!

As you may remember, I’ve been fiddling around with resin casting, working up to sculpting and casting my own wargaming minis. I ran out of the white resin I’d been using previously, and broke out the Smooth-cast 325 I bought a month ago. It’s “clear” and, in theory, tintable, although I haven’t sprung for any of the colors they sell for it.  Allegedly, it’s got the same work and demold time as 300, which I’m now quite comfortable with.
I tried to run up some quick-and-dirty armature casts for the torso and arms of a Destroid Phalanx/Longbow LGB-0W that I’m sculpting.
Short story? It did not go well.

Longer story:
(more…)

Project Log: Pinewood Derby (Gary’s)

So every year Kayce runs a pinewood derby at Gary’s (see sidebar) (Gary’s has since, sadly, closed.) to celebrate her birthday. They’ll post more stuff on the Facebook page later, along with a vote for the prettiest car.
Anyway, this is the first year I participated, finally feeling comfortable enough to try. Bought a standard Woodland Scenics $4 kit with a 2×2 block, some axles, and some wheels.

Tools:
400 and 600 grit 3M sanding blocks.
Gerber pocket knife
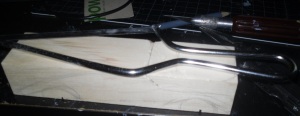
X-acto (#2 blades), razor saw (used to start the hacksaw cuts)
Bargain-bin Hacksaw. I think I got it from Harbor Freight like 6 years ago.
JB Weld “Qwik Wood”
Hammer
Various Deco Art acrylic paints

Step one: Roughing and carving the block.
Partway through the first cut I belatedly realized that I have a blog, and random people might actually like to see this.
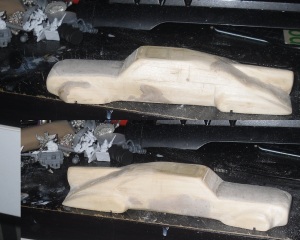
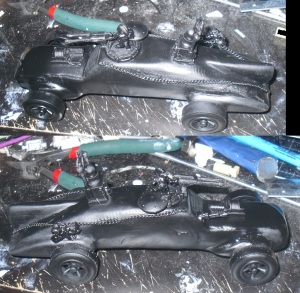
SDC10029This is partway through the first cut. You can see the roughed-out design freehanded with pencil on the side of the block here. It changed a little, of course. This is ~3PM

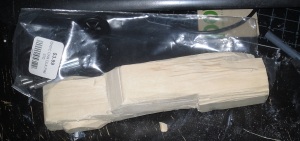
SDC10030Started whittling.  Don’t worry, I patch that horrid fuck-up in the hood later.
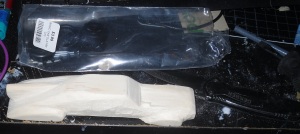
SDC10032Mostly finished with the sanding now. You can see my knife in the top right corner here – had to sharpen the blade 5 times before I was finished.
SDC10031
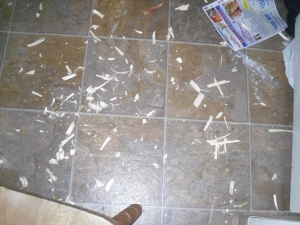
The kitchen floor in the aftermath… After that, it was bondo time.
SDC10036
Here you can see some of the stuff I was roughing out for the decorations. Unfortunately, none of the pictures I took of this step came out :/
~5PM

Step two: Detailing and painting.
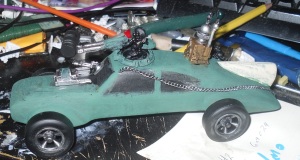
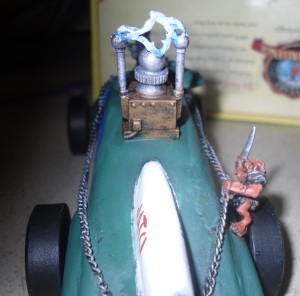
SDC10037Detailed and basecoated. 2 Reaper Bones kobolds, a Games Workshop Land Raider hatch and Rhino hatch arranged like an Israeli/British turret, part of some weird Dr. Frankenstein diorama I bought ages ago (see the comment below for the post where I finally IDd the damn thing), a shitload of Green Stuff, and an Unseen Rifleman (actually a 1/300 Macross destroid) arm. Chain is from my inexhaustible supply of crappy aluminum quarter-machine jewelry chains, anchored with green stuff. You can tell the thing on the head of the “gunner” kobold was supposed to be a taco hat, because pirate kobolds. This was taken around 7:30 PM.

SDC10040First bascoat layer. After this I went to do other shit for the night (cook dinner, watch Deep Space 9 with my wife, etc); ~8:30 PM.

Day Two: Painting.
Started at 9:45 AM. Had to leave by noon-thirty, so I had to bust ass to get this done.
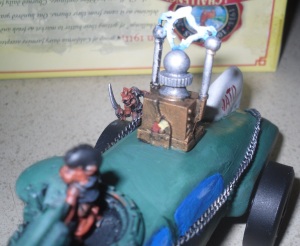
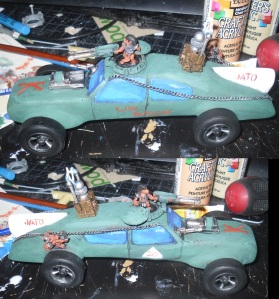
SDC10043In this shot, the varnish is still wet, ~1205. Unfortunately, it started to frost, and I had to patch it.  Text on left side reads “Luv Waggin” and on the right is a “20” inside a triangle. “JATO” in stencils on the rocket pack on the back.
SDC10050SDC10049The Van De Graff generator on the ass-end. I wonder how bad-ass it would be if it went into the red? :b
Note that the “pirate hat” has now, sadly? devolved into a pompadour, but it’s still sufficiently awesome to require no redo.

SDC10055Finally, a shot of me and the other racers on race day (I won!). Kayce’s Twinkie in the middle, Tim entered the Gandalf wagon to its left. (Entries are arranged in order from first place in the races on the right, to last on the left). There’s still a contest for best-looking racer, which will also go up on the Gary’s facebook page.

Mold Experiments, days 5 and 6

Well, new year, and first case of food poisoning on day one. Well played, /13..

In molding news:
The Scriptarius method (caulk accelerated by acrylic paint) produces a tough, heat-resistant, and detailed mold.. but it’s not reliable. Or especially good at preventing surface damage and imperfections. It also stinks like a mother.
Worse, it causes lead rot: acetic acid is the curing agent and causes lead corrosion. So old models (the kind you most need to cast bits from for, say, repair and mirroring) will be destroyed.
It’s cheap as hell – ~$8 for materials made enough for about 8 mold halves – but I had to throw away every single one of them. Only two halves of two separate molds came out acceptably, even after I ruined an old paintbrush brushing a thin layer onto the master before pouring the structure. The quality of any individual mold half and pour also varied wildly, even though my last four pours were made with identical quantities of identical paint, the same amount of caulk, and nearly identical mix, pour, and cure times – halves ranged from dense, detailed, and opaque to translucent and spotty with almost no rhyme or reason.
I may try again with a thinner master, or try to find a less-viscous form of base RTV, but for now.. the tin-cure won.

My first tin-cure throw took about an hour of carefully prepping the matrix and mold box, and then another half-hour or so of cleaning and checking the first mold half for issues. I used leftover rubber from the first batch as filler on the second and subsequent batches of rubber. The first cast off of it, however, was perfect. Lots of flash, not like I wasn’t expecting that.. but no surface flaws, the mold lines matched perfectly (the hardest part of the prep work), and the cast model actually has sharper detail than the master, which I blame on the superior casting material.
The tin-cure is expensive – $25+ a kilo – which I currently estimate will last me for another 12 mold halves discounting filler. On the other hand, it’s thin enough to work well, even if it is more toxic.

Speaking of which; I’ve been working a bit with Smooth-0n 300 now. It’s amazing how far it goes – 1T made a bulky 28mm model with flash to spare. It’s fragile: bendy and rubberlike as you first pull it from the mold, but subsequently becomes more brittle. If you want to adjust a pose or the like, do it fast. It also helps to run a little wire inside the mold before you cast, especially inside thighs, upper arms, and other fragile bits (although you can also use plastic rod/strip; I used Q-tip shafts [the hollow rubbery soft plastic kind] in my second mold with no adverse effects) to strengthen the parts.
My first cast seems to be holding the primer (standard Krylon flat black spray) well, and I’ll paint her up tomorrow. I’ll mix it in with some of my other stuff in the pics, I think..

Also, more tutorially stuff, hopefully with more pics, to give you a better step-by-step feel for the process.

Mold experiments, day 4

I saw The Hobbit on Saturday. I was extremely disappointed. Further details in another post.

Mold 2, Side 1:
Material: DAP Silicone caulk, catalyzed with Delta Ceramcoat Mediterranean Blue (10 drops), approx. 1/4th cup
Matrix: Van Aken oil-based non-drying clay
Cure time: 12 hours
Size: 2″x3″
Mold frame: 3 legos high

This was the first mold attempt with Van Aken, and also the first using legos as key pieces.
Outcome: Botched application of silicone.Parts of the side, bottom edge, and areas around the master did not receive enough silicone – I didn’t press it down hard or well enough – and the silicone became lumpy and missed areas. Key blocks turned out very nicely, however, and the Van Aken made a good and pliable surface with which to work.
This mold was also slightly shallower than the master required.

Mold 2, side 1 redux:
Material: DAP, catalyzed with 8 drops of Med. Blue, approx 1/3 cup (previous mold too thin)
Matrix: Identical
Cure Time: 14 hours
Size 2″x3″
Frame: 4 legos high

On demold, discovered that the clay had picked up a pretty hefty amount of acetic acid, and had a surface consistency change. Airing it out on the back porch; this gives me concerns about future plastic molding, however, as having that much acetic acid right against the curing surface will likely slow the exchange reaction even with a catalyst – possibly ruining surface detail. Silicone partially rejected the catalyst; pockets and chunks of paint are visible, and the mold is more transparent than normal. Increasing paint amount for next cast.

Mold 2, side 2:
Material: DAP caulk catalyzed with 15 drops (better safe than sorry..) of Med. Blue. I’m also using almost a half-cup for this cast.
Matrix: Mold side 1(bis)
Mold release: Mann ease-release 200
M.R. Application: heavy spray, brief brush over master, second lighter spray
Cure time: intended 11-12 hours.
Frame: flipped previous frame and poured into bottom
Size remains the same. Final mold will be just over 1-3/4″ deep.

My master is vinyl, so I’m worried about possible damage to it from the M.R. We’ll see in a few hours.
Edit: no visible damage to master on demold.
Mold release failed; the mold halves were stuck together, and once again only the differing densities and shear line allowed me to get them apart. Will first try a heavier application and letting it sit longer, before switching release agents.
The silicone also had some foaming and detail loss, as with last time. The key blocks were filled incorrectly, and there were some potentially really nasty flash areas around parts of the master.
This is by far the thickest area/mold I’ve tried to cast: I suspect I may have to build the next mold half in separate sections instead of in one go, further complicating the mold release issue. It also looks like the thicker (viscosity) silicone may be complicating the casting process.

Further testing suspended until after Christmas. Will try a cast to see how buggered Mold 2, Side 2 really is..

Molding experiments, day not-a-day

Experiments suspended for today, after dealing with Christmas shopping and the government all of it.
Picked up a pound of Van Aken modeling clay, which was specifically recommended to me as silicone-resistant, for less than $4.
Also got some professional mold release (Mann Ease-Release 200, which is some toxic-ass shit) for $13.
They don’t have tin-cure 10:1 (only the “oomoo” 1:1, which has slightly worse work life, detail, and mold life – and costs $4 more) at the local Blick. It’s still cheaper than it is from Smooth-On. That’ll have to wait until after Christmas. Total cost to date is about $50 (not counting the legos from my collection I’ve sacrificed to the mold frame gods), so I’m still running pretty cheap.

Casting experiments, day 1, log.

This is actually my second attempt; the first time I didn’t know about using accelerants with RTV.

Mold attempt 1, side 1:
Matrix medium: Dow Poster-tack, no mold release.
Accelerant: Art Advantage acrylic paint, “Mars Black”, 1/2t water (paint was drying, but still had a good supply of glycerine)
Mold Material: 100% silicone “Liquid Nails” RTV adhesive. Ostensible 16h set time.
Set time: 24 hours
Mold size: 1″ x 2.5″

Results:
10h: Mold is sweating paint, firm with no noticeable tack.
24h: Demold. Mold half still wet with paint, sweats paint when squeezed. Removed test component, pressed mold to remove water/paint.
Poster-tack does not adhere to silicone, but does stick, badly, to component and lego mold frame.

Cleaned part, inverted mold.
Mold attempt 1, side 2
Matrix: Side 1 mold
Accelerant: Deco Art brand Bright Blue acrylic paint, no water.
Mold material: DAP 100% silicone RTV caulk.
Mold release: cornstarch.
Set time: 16 hours
Mold size: 1″ x 2.5″, 1/2″ thick
Brushed on initial layer, then packed with gloved hand. Using table lamp as further accelerant.

Results:
Mold material much smoother to mix; horrible stench. Adheres vigorously to gloves and brush.
Edit: 7h. Mold is hard, almost completely free of scent. Demolded, and this half is looking excellent. Slight adhesion to lego frame, not nearly as bad as the Liquid Nails half. Cornstarch acceptable as a mold release on legos. Liquid Nails half of mold destroyed in demold attempt (it re-softened somehow), but current half is intact.

Cleaned and rebuilt lego mold, cut primary flat and trimmed off undercuts.
Mold Attempt 1, side 3
Matrix: side 2 mold
Mold Release: Remington aerosol machine oil.
Set time: 8 hr tentative.
Size, method, Accelerant and material: identical to previous test.
Should be good. I hope.