Model Review: 1:288 (6mm) Eastern Express Antonov AN-71 “Madcap” AWACS

Summary:
The EE Antonov AN-71 is a fun, quick little build that will look fine as a gaming piece. Probably not the best overall choice for a “serious” micro-mini modeler, who will be screaming and flinging it out the window within minutes. 1:288/6mm scale makes it compatible with quite a few wargames, including Micro Armor, Fistful of TOWs, Battletech, and Robotech RPG Tactics. The limited historical deployment of this particular aircraft will hurt its utility for historical gamers, but other models in the series would likely serve them much better.
For Robotech Tactics modelers, the AN-71 is also an excellent base for an alternate version of the ES-11D “Cat’s Eye” recon – one of the guys on the Robotech Tactics Facebook group did up a conversion you can see here if you’re a group member.

Background:
First off – a little history. In 1984-ish, the Antonov company put together a bid for a new AWACS version of the AN-72 light transport airframe (NATO callsign “COALER”). It was intended to vector in ground-attack forces at the tactical level (taking the load off of the larger “MAINSTAY” and “MOSS”, which were busy handling strategic responses and combat air patrol), while taking advantage of the AN-72 airframe’s ability to make use of short, poor-quality runways and improvised airfields. While loosely equivalent to the role of an E2-C Hawkeye in USN service, the AN-71 was supposed to be a land-based design (the naval role was supposed to be taken by the Yakolev YAK-44, which never surfaced).  NATO assigned the bird the reporting name “MADCAP” after its first flight in 1985. Unfortunately, the USSR only ever made three AN-71 airframes before the economic collapses of 1986-88 killed the program. One of those three prototypes was shipped off to the Ukraine for their new Air and Space museum while they were in the process of seceding from the SSSR, which is why this particular model was originally Ukraininan.The Eastern Express company put out a series of models based on the Museum’s holdings, all nominally in 1:288 scale. Toko seems to have put out a version of the series as well, and you can find a box in the US from Imex (I got mine on the ‘bay for $4, so always check your supplier..)

The AN-71 herself is pretty unique – a STOL design that uses engine exhaust to increase lift over the wings. Unfortunately this design, while efficient, tends to be damned noisy for the poor saps inside the cargo bay, but hey. Whatcha gonna do? *(cancel it if you’re Boeing, of course. Keep using it for fifty-plus years if you’re a Russkie..)

Surviving AN-71 on display in the Ukraine

The Good: Simple, clean instructions. Good decals, although I have no need for them. Generally decent fit and polish on the kit.
The Bad: Lots and lots of flash on frame “A”. It cleaned up well after a quick pass with an emery board. Some gates on detail elements distorted the radome and tail. Shallow detail cuts had to be sharpened.
The Ugly: Does not include any parts to make closed landing gear bays. The engine mounting surfaces were poorly-designed, and the wing overall required a lot of work to mount.
Full model build/review under the cut. My apologies for the poor quality of a couple of the images -I plead being sick as hell and having a shit phone.

(more…)

Making 28mm Asphalt Roads [Modern/Post-Apoc]

Following on from a post over at Tabletop-Terrain about making roads with self-adhesive floor-tiles, I swung by the Home Depot (gotta love that 10% veteran’s discount) and picked up a sample of this shit – TrafficMaster “light brown travertine” SA vinyl. Given that it’s running less than $1/square foot, and each square foot makes two 12″x6″ road sections, this is going to be a about half the price of my previous favorite option – Ikea “Avskild” cork placemats.

Before I break down the advantages of each, I figured I’d put up a quick shot to show you the texture of the vinyl tiles versus the cork.
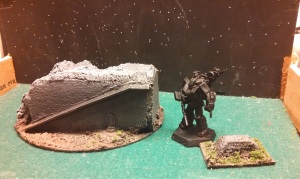
• Ikea Cork sheeting, painted as concrete (from the Airbase Toblerone project).
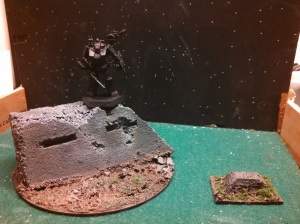
IMG_20160605_213622_431
As you can see, it’s got a pretty fine texture, even on the smaller bunker. Good for concrete, but it’s not really my favorite on the asphalt front. The surface tearing is nice and chunky, and the edges wear pretty well.
Unfortunately, I don’t have any pics of the commissioned road set I did a few years ago, but we’ll go over my experience with them below.

•Trafficmaster tile, inked and uncut (I just slapped some India ink on with a wet rag and took a photo here without cleaning the tile first: the pale spots appear to be greasy areas from previous handling..).

img_20161030_151202_887Here we’ve got a much more irregular surface, and it’s already very reminiscent of weathered asphalt even with the pale spots and brown undertone. It is, however, a thin sheet of plastic – less than .25mm – laid over a ~1.5mm rubber sheet. That may make larger areas of surface damage look less realistic unless I cut out the undersurface and hammer the surface plastic down into the “damage” pattern, or fill them with basing ballast.

So, what’s my take so far?

Cork sheeting

Advantages –
Realistic surface damage (for both asphalt and concrete). It’s easy to sink in some paper clip wire to simulate rebar on a broken section, or a small piece of low-gauge copper cable/plastic pipe for other conduits, which dresses up the edges nicely.

Multi-purpose. Crumbled scrap bits make great rubble. You can face a chunk of foamcore or stiff card with the cork and get a plastered concrete surface in minutes – one that’s also easy to trash and make look good.

Super-easy to work. Cutting, fitting, and weathering the cork bits for both of the pieces in the pic above took me about two minutes.

Cheap. Granted, both of the materials have that going for them, but it bears repeating; this stuff costs about 75c/ft^2.  In other formats, unfortunately, that’s not so true – a straight-up roll of cork from a craft or art store can be more along the lines of $5/ft^2.  And there’s a certain amount of wasted material because of the rounded edges of the Ikea stuff and the weird size.

Disadvantages –
Poor surface sealing coupled with moisture sensitivity. You have to paint PVA or another sealant onto cork, or it has a nasty tendency to swell. That flakes off paint. It also behaves oddly when painted unless you seal it – soaking in some colors, repelling others, and generally being a pain in the ass. Plus, again, it can swell or crumble without sealant while you’re painting it, screwing up your effects or damaging the piece.

Fragility – the same thing that makes it easy to work makes it hard to store. Cork works best as a facing on top of another material, like heavy card or styrofoam. In storage, dropping or bumping the container can shatter off a large chunk of cork, and the pieces frotting against each other in the box will not just wear the paint but tear chunks out. That means you need padded storage and rigid containment, which reduces the amount of stuff you can store in a given space. With roads it’s less of a problem – you can wrap them in cheap felt and glue a sheet of craft foam to the edges of the box – but storing a large building is a >massive< pain in the ass

It just doesn’t look like asphalt at larger scales. With a good paintjob, you can pass it off pretty well at 6-10mm, and I’ve seen some guys make 15mm look decent, but at 28+ it looks like shit unless you work it as concrete. How many cities or highways do you know of that use concrete for the roads? Yeah. It’s fine for sidewalks and warehouse floors, but not roads.

Vinyl Tile

Advantages –
Tough as hell. I did a few experiments with a painted chunk, slapping it edge-on against a desk and flapping the piece back and forth. Paint held well, and even the section I stripped the vinyl from seemed to be doing okay. Unfortunately, rubbing the painted sides together did do some paint damage, so I’ll still need surface protection, but rubbing gently with stiff, sealed card didn’t do too much damage. I think I may be able to get away with just peeling and sticking the flooring sheets onto posterboard and using that as layer protection; for more on that, see “conclusions” below.

Great surface texture. I mean, look at that pic again. That’s literally a thirty-second swipe of india ink – not a damn lick of paint – and it already looks like a road.

The sheets are a better shape and size than the Ikea mats I’ve been using, which means there’s less waste. Basically with cork I got two 6″x16″ chunks of straight road, or two 12″x8″ sections. Lots of room for a shoulder, but the roads also wound up looking unrealistically wide compared to 1:43 or 1:48 cars (let alone the figs). Of course, I could trim off that extra couple inches on each side and use to make sidewalks and curbs or building parts, which was pretty cool. With the vinyl I get four 6″x12″ straights, nearly quadrupling the yield per dollar spent.

On that note, the sheets are even cheaper than cork, especially in bulk; I can get ten 1’x2′ sheets for under twenty bucks. So for the same $20 I can get either ten sections of road with sidewalks/shoulders, plus 2 intersections per road section I drop, or forty sections without sidewalks. Sections that require less reinforcement and storage area.

Properly painted, it also looks like facing stones. With a little work, it’d be great for adding a “sandstone” texture to the lower floors of Foamcore ruins, which means I still have an outlet for scraps. Cork does have an advantage, though, in that crumbled bits of cork will look great just tossed on a rubble pile, where this will require trimmed and (roughly) squared sections of the scrap rather than “whatever’s left”

Disadvantages –
Heavier, by a substantial margin. Each sheet weighs about half again as much as one of the placemats, making it harder to transport on foot/bus.

Harder to weather and simulate surface damage – as I mentioned above, just picking the surface off reveals a chunk of rubber, which has a terrible texture. So you have to backfill the holes with basing ballast, or find some other way of getting an interesting texture instead of smooth cuts. That adds working time as well, which seems to be compensating for not needing to seal each individual piece.

Harder to work – This shit is dulling the HELL out of my boxcutter, and straight-up snapped a #11 Exacto blade within 5 cuts. It’s also tearing the shit out of my leatherworking swivel knife, which is why the boxcutter is getting an outing. I also can’t slap it up on the deck of my paper-cutter to just slice off straight sections, which means breaking out the rulers, square, and compass.

Floppy – A disadvantage both share, but the higher weight of the sheeting makes it more noticeable. I’m gonna need to give these a stiffer backing to keep the paint on, even if it held reasonably well in the basic tests.

Surprise contestant:
EVA (Craft) Foam
Advantages:
Easy to work, soft, multi-purpose.

Disadvantages:
Poor surface texture, floppy, fragile, and more expensive than either. Worse, it’s sensitive to heat and to spraypaint, so it’ll need sealing.

ConclusionsI’ll definitely keep using cork for my own street/postapoc projects, but I’m about to add a lot more vinyl to my toolbox. Given the properties of both, I’m thinking of using an 8″ wide strip of black posterboard, with the vinyl laid on top (using its own adhesive) as a road bed and either cork sidewalks or ballast to simulate gravel shoulders. I could also take strips of foamcore and cut out roadbeds from the center ( just leaving the bottom layer of card), and mark up curbs/sidewalks onto the raised edge sections. The foamcore method is almost certainly going to be the way to go if I’m making bridges/overpasses, unless I can convince that guy in the Makerspace to let me use his laser cutter on some MDF or hork up for the Hirst Arts bridge mold..

Pirate conversions, and more Black Widow work (TotBWC, Battletech)

So, I’ve been much more productive these last couple of months than usual. Part of it’s getting on the right meds for a change, part of it’s completing the better part of a year’s worth of therapy for my ADHD. Now I’ve got time to work on something other than fixing my headspace, I’ve been working my ass off on my project backlogs. It hasn’t really made it onto the blog, since a lot of my projects have just been aimed at unfucking my house or otherwise not hobby-related, and I haven’t been in the mood to write for a while either. But now it’s too hot for carpentry, so back to the keyboard we go.

Right now I’m working on my massive post queue; I kept starting posts and then abandoning them to the ether after twenty minutes over the last year or so, and now I’m going back and finishing them – or adding on the stuff that I quit writing to do and never got done.

This is one of those posts – a selection of the ‘Mechs I converted/prepped/repaired in the course of three days back in June. I had to pull a couple back for QC (like the Bounty Hunter), but it was a lot of fun.

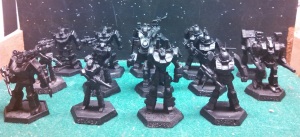
Overall production

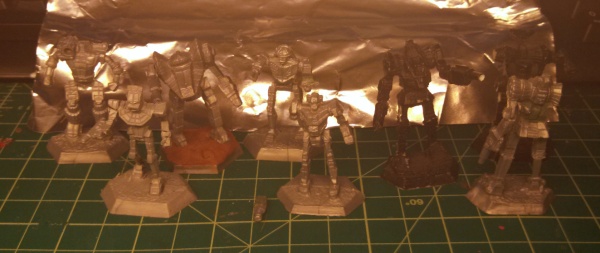
Left to right, front to back:
Front row: SHD-2D “Vang” custom Shadow Hawk (This one is a little surprise for the mission “Leave No Survivors“; check below the break for the tech readout. It’s a beast), Stinger, Crusader, converted GRF-1S “Steiner”.
Second Row: Stinger, converted Wasp (left-handed, with a Recon Camera, two Vehicular Grenade Launchers, and a Small Laser replacing the missile system), an ICE Thunderbolt (modified from Steve’s design in 3063, see below the cut), a dressed-up Griffin with a Dougram Bushmaster’s linear gun, and a stock WHM-6R for the Santander Killers.
Third Row: two stock Wolverines, plus a Shadow Hawk converted to a Wolverine standard. See below for the parts breakdown. After that there’s another upgunned Griffin and a reposed and cut-down Stalker for the pirates (I’m using the stats for the lightened 80-tonner with it).

IMG_20160605_213303_957Detail pics:
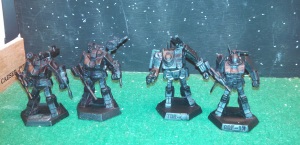
Here’s some slightly better shots of the four who do me proudest.
SHD-2D “Vang”: Added another Dougram light Linear gun (the ML on the Shadow Hawk) from my gashapon collection, and put on a light SRM from the same source. The over-the-shoulder gun is the Large Laser I took from the Thunderbolt, mounted on a small part from a MW Clix mini. I recarved the area next to the head to remove the original grenade pack and plugged the SRM holes in its “collarbone”.

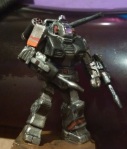
SHD-2 “NISE* Wolverine”: So, I’ve always disliked the way the Wolverine looks (heresy, I know. Shut up.). I scored a 3e plastic Shad on Ebay for $1 since the backpack gun was damaged and the laser had broken off. And I figured “Why the hell not? Someone’s gotta get a Command ‘Mech out of this, and pirates seem like the folks to do it”. First I rebarreled the arm laser with a bit of wire and some Green Stuff, then added a spare Command Destroid pack to the back in place of the AC. I mated the AC receiver to a barrel cut from scrap from a WH40 Basilisk fighting platform railing and a short magazine made from plasticard, then mounted it under the fore-arm. It’s hard to see, but there’s a small finger guard attached to the hand-grip. The missile rack is a carefully re-cut pair of SRMs from a JES-1 carrier. I also filed off the VGL mount on this one, but left the gap clear for the backpack SRM to shoot through.
This is going to be the leader for Recce lance of 2 Coy, Santander’s Killers.
*From the Gundam fandom. Refers to a “mocked up” or faked version of a ‘Mech using another’s chassis; the original NISE Gundam used a GM chassis.

TDR-6FX1: I like diesel Thuds. You like Diesel Thuds. We all like ’em. So this was an easy rebuild choice for another E-Bay rescue Thud. The shoulder mount is a pair of Dougram Linear guns, cut down and reinforced, with a Locust-like arm pod made from plasticard and a plastic rod. The arm got a Wolverine hand-gun from a WVR-6M conversion I did ages ago for a buyer, plus a shield from an MS-06F Zaku II that I had converted to a Zaku I. The smokestacks are made from sprues, and I sculpted a simple engine and heat sink into the back (as well as the laser pack space in the front). Given that these things are supposed to be like forty years old by the late Jihad, I busted her up a little bit too.

GRF-1S: This is a simple up-gunning, using components from a Roundfacer “Korchima Special” as well as a RRPGT Defender radome and some cord.First I cut away the shitter guns that come with the vinyl 3e minis, then carefully sawed in the detail on the legs and re-carved/sculpted the shoulder and side of the head. I added a small “reactor pack” on the back using a casting taken from a AAA battery, and wired it up to a recast Roundfacer gun. I tried a couple different components to dress up the other side of the pack, but the radome just seemed to fit so well. On the other side, I’ve mounted a smaller missile launcher, taken from a Dougram gashapon. Oddly, given how much time and effort I sunk into the others this one is still my favorite-looking.


The Future:

Painting to come once I finish allocating to the various forces in the book, though I already have homes for the Stalker, “NISE” Wolverine (both to the Killers), Thud (Canopian militia), Stingers, Vang’s SHD (Draconis March Militia), and Griffins (One each to the Donegal Guards, Killers, and Black Widows). On the shelf I’ve got some converted Archers, Pixies, the Bounty Hunter (3015), a few Valks, and the Dougram gashapon to fiddle with, plus a fuckton of vees.

Record sheets:
Below the cut, with some quick commentary on the design process and ideas behind them.
(more…)

Airbase Toblerone: Part one (Battletech, Robotech Tactics)

As promised (two weeks ago -_-;;) here’s some WiP shots of the terrain I’ve been working on. I got a fire lit back under me while working in the local makerspace with one of the guys on some really basic foam-cork stuff, and started back up on one of my long-term stalled projects; a fully-fleshed out 6mm Drop Port and/or HPG station for Battletech and Robotech Tactics. The wall and command bunker entrance here come from that session.

Ha Shi Dao complex front

“But what’s the ‘Mech, Doc?” Come back tomorrow for more..
IMG_20160605_213655_604 They’re loosely based on the Hai Shi Dao defense emplacements from Steel Battalion (Christ I love that game), and depicted as shelled and partially knocked-out. The intact emplacement on the left in the bottom pic is going to be getting a twin-AC/10 emplacement later. I really wanted to get a kind of “churned and barraged” feel, so I referenced a couple paintings of WWI battlefields for the ground colors on the main emplacement. You can also see a partly-overgrown crater with bits of a tree in the foreground of the piece.
Airbase step 2

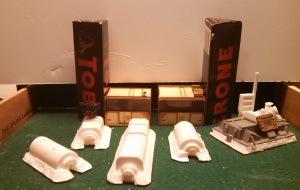
For the main buildings, I rooted out one of my old ERTL Space Shuttle kits for the EuroLab components and the  GPS satellite payloads (I’m converting the Shuttles themselves into mini-Leopards, but that’s another post) to make the Quonset huts and barracks. The Command Center is a fighting deck from a Warhammer 40k Basilisk that I’d converted to a direct-fire SP gun, along with a few resin scrap components and a Cardassian comm screen from an old Star Trek figure. All are mounted on 1/8″ foamcore. The beveling was done roughly with a sharp hobby knife.
The gate towers are each made from half a Toblerone package (which I’ve been wanting to do for ages), scrap from the “Storage Units” that I got from the Burn In Designs kickstarter as ‘Mech hangars, and bits from a trashed Mechwarrior DA figure I used for parts on an N-scale kitbash. The bay windows are simply cut from mini blisters. These are still waiting on internal floors for the third deck and some catwalks against the back wall, as well as armament for the towers. I’m focusing on the plastic buildings at the moment, so I can get as much as possible put away before doing any more heavy conversion lifting.

Airbase progress 10 Aug 2016Current status after base-coating.
I sealed the foamcore with PVA glue, then added sand and flocking with another couple coats of glue before spray-coating. No melting, so I must have done it well enough..
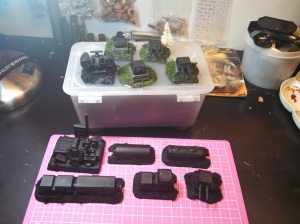
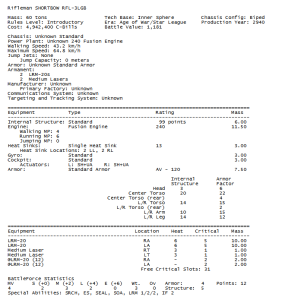
You may remember the turrets here from my casting tutorials (link to first post here). I’ve since converted a few of them to laser and missile turrets, as well as a massive mini-missile rack and a “mechaturm” based on the old German Panzerturms. The turret torso is from one of my own “Shortbow” custom FrankenMechs. The readout below is just for the “factory” option, since making a Franken proper is a massive pain in the ass.

Basically just slap an LRM-20 in each arm instead of those shitter ACs and you get a startlingly competent back-line fire-support unit.

Basically just slap an LRM-20 in each arm instead of those shitter ACs and you get a startlingly competent back-line fire-support unit. Enough sinks to fight, ammo for days, and no armor to speak of. It’s perfect!


Remaining for this project: Doll up the Burn In Designs modules and the Toblerone Towers, prep the power center and fuel farm (I have the parts, just haven’t put them together) and make a blast shield for droppers.

End of an Era (40k, Sisters of Battle)

I don’t talk much about Warhammer on here, simply because I don’t play it any more, but I used to be an avid – even tournament-level – player. I have almost a full maniple of Space Marines with armor and scout support, a very large cultist/IG force based around Necromunda Eschers and converted IG, some Inquisitorial forces, and various uncompleted vehicles, even an entire unfinished army of Dark Eldar and AdMech. But they’re not really what this is about.

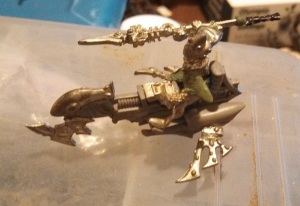
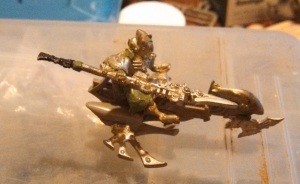
Last year, I sold my Ulthwe’ Eldar to a friend. Then again, that army never really got off the ground as far as I was concerned. I had a couple of cool conversions in the force, but I really made it (back in the halcyon days of 3rd edition) to prove a short, extremely violent point to a local metagame that had been obsessed with Swordwind armies. Nobody in the area had ever played against an Eldar swarm with shitloads of cover saves, and it ended hilariously – especially the deathball of 40 WS5 I6 Storm Guardians massed around an Avatar of Khaine. Part of that force was a converted Jetbike warlock of whom I was particularly fond, as well as a massive Seer Council – I actually owned all but one of the Farseer and Warlock models that GW had produced up until 6th edition, with over a dozen minor custom jobs. Anyway, when I sold them, I documented a couple of my conversions for my own archives. IMG_20140404_241747_286 IMG_20140404_241802_233 IMG_20140404_241813_972 IMG_20140404_241840_036Now, though.. another friend of mine has offered to buy my Sisters of Battle.
Sisters are what got me into WH40k, specifically the infamous image of the Palatine crushing a skull under her boot as she advances from the cover of the 2e Sisters ‘dex. They were my first and last love in the game, and they kept me playing through a decade and four editions. I have hundreds of painted sisters and over a dozen vehicles (all based on the old Rhino chassis). At the same time, I’m never going to wind up playing again. It just feels insulting to the Girls to leave them in a box for the rest of forever, especially since they’ve won me many tournaments and dozens of friendly games (not to mention, of course, dying hilariously in dozens more).

Those desultory photos I took for my Eldar just won’t do it for the girls. So over the next week or so I plan to photograph my models, share some memories, and talk a little bit about my games with them and my experiences as a Sisters player over the years. I’m heading off to set up the lightbox later tonight, and we’ll go over the squads and my notable conversions  as I post them.

Quick personal update/USN Squadron Reference dump (Robotech Tactics, Battletech)

Spent all day yesterday and a good part of today painting up my entry into the most recent Iron Painter contest on the Battletech forums. The deadline is Dec. 1st, in case anyone out there is watching and wanting to play.
This weekend is the big Customer Appreciation sale at Olympic Cards and Comics, so I limped over there and grabbed assorted Christmas gifts for the folks (and magnets, as well..).

I’ve been toying with the idea of painting up my Valks as some of my old squadrons from CAG-9, partly to give me a reason to finish my cruise jacket and use up all my patches. Since I was combat-deployed during the time-frame of both the Global Wars and the First Robotech War, it stands to reason that some of the squadrons active in the era might have survived and folded into the UEDF. Plus, we know the Screwtops and the Top Hatters survived into the Robotech war by the markings on some of the Valkyries in background scenes. Hell, Skull Squadron is blatantly the Jolly Rogers.

Seriously Roy, get that thing on your back looked at.

As far as assigning them, I know the Golden Hawks are getting the VEF-1 squadron (that royal blue and gold screaming eagle looks amazing on a radome), and the Checkmates will be at least one of the Valk units (my main intercept squadron). I’m thinking, though, that some of the Attack squadrons should really be rocking Destroids, possibly one squadron per Destroid type. The Screwbirds would map well to Defenders or my Lancers, and the Black Knights would of course be rocking the Tomahawks. I know I’m going to have several units of Spartans and Phalanxes, so I may just set them up as the Blue Diamonds and Argonauts, and HS-8 as the Ghosts.

The Argo’s commander’s bird is damned sexy too. Tell me that wouldn’t look good on a Phalanx..

The other option, of course, is to use the funniest squadron names possible; the Fighting Redcocks (with whom I also deployed), the Red Rippers, the Puking Dogs..

Actually, this is a decent time to talk about squadron markings, in case you’ve ever been curious as to how they work. The Argo up there, for example, is marked “NH-200”, and belongs to squadron VFA-147.
The order of precedence is Air-wing/squadron/plane number. Each Air Wing has a 2-letter code, further broken down into “coast” (Atlantic = A, Pacific = N) and the wing’s unique letter. These are completely arbitrary, however, so all you need to know is that they don’t use the same letter twice. I’ll be using either “O” or “R” for “Orbital”.
The first number in the 3-digit designation is the squadron number in the Air Wing. Traditionally, the Intercept squadron(s) – the “fighters” – are squadrons 1– and 2–, the attack squadrons 3– and 4–, and the Electronic Attack and AWACS (Airborne warning and control) units get 5— and 6– respectively.
Thus, NG-400 is the leader of the 4th squadron in “Pacific Air Wing G”.
The Squadron’s call-numbers, meanwhile, tell you what kind of unit it is. So “VFA” means “Fixed-wing” (V) Fighter/Attack (FA) Squadron. “VAQ” is “Fixed-wing” (V), “Attack” (A), “Electronic” (Q), and so on.

So, how can you apply this to marking your units?
The Air Wing’s commander typically flies in 100 or 200, with his XO flying in the other of the two, or on his wing in 101/201. That’s where your VF-1S and/or VT-1D are most likely to be. Yes, it’s beyond me why they made the frigging Training variant a commander unit in RRPGTobotech, but whatever.
Destroid groups would likely have higher squadron numbers than Valkyries. I’m using “D” to re-designate them, so VFA-146 would become DA-146 if I loaded them into Spartans, while VMFA-314 (the “M” is for “Marines”) would become DMA-314.
The VEF-1A is technically a non-combat or support unit. Non-combat squadrons get numbered after the other, sexier ones get theirs, so something in the 6-7 range would be appropriate (2 Valk squadrons, plus 3-4 Destroid groups, and then the AWACS squadron).

Edit: Current marking scheme follows
UN Space Self Defense Force Veritech Combat Group 9, call number OH
Valkyrie units:
OH-1xx – VT-211 “Checkmates”  – VF-1R with VF-1D support
OH-2xx – VT-31, “Tomcatters” – VF-1A with VF-1S support
OH-3xx – VT-147 “Argonauts” – VF-1A with VF-1J support
OH-4xx – VT-146 “Blue Diamonds” – VF-1A with VF-1J support.
OH-5xx – VTAQ-138 “Yellowjackets”- VEF-1, no support. 5 aircraft.
OH-6xx – VAQ-112 “Golden Eagles” – Cats-Eye Recon, no support. 4 aircraft.
Destroid Units:
OH-7xx – DMA-314 “Black Knights” – Destroid Tomahawks and Spartans. Major William J. Smithson commanding.
OH-8xx – DS-22 – “Fighting Redcocks” – Destroid Defenders with Tomahawk support. “Ogre” Inman commanding
OH-9xx – DA-151 “Vigilantes” –  Destroid Phalanxes with Defender support.
Drone Units:
OH-0xx – UP-8 “Eightballers” – Ghost Drone Fighters with limited Lancer support.

(DS: Destroid Superiority/Anti-air)
(VTAQ: Veritech squadron, Spaceborne Early Warning/Electronic Attack)
(UP: Unmanned Patrol, wingless)
Units are split out by type now, which bumped up the VEF squadron.

Star Trek Attack Wing: U.S.S. Saratoga Conversion/Repaint

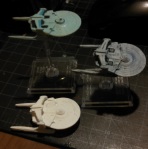
As I mentioned over on the Tumblr, an unexpected windfall left me able to play in the Attack Wing tourney today; AAR next post. I spent last night painting up my Saratoga conversion. The original intent was to stick Ben Sisko in his Saratoga (played by the “Miranda-class” card), Clark Terrel in a generic Excelsior, and Sulu or a generic in the Defiant. Yeah, I know, about as anachronistic as you can get, but it was what I could get out of the cheapest possible setup for the tourney..

IMG_20140807_195837_554
I was originally going to compare paint jobs by basecoat, then convert up the Sara and use the best. I wound up simply blazing through the conversion and paintjob to save time – a full photoset would have kept me up until the wee hours.
Top -> bottom:
Original Attack Wing mini
Stripped/black primed Heroclix with a grey basecoat and a magic wash
Untouched white-primered Heroclix

IMG_20140809_231926_780
The white primejob was shit (and somehow repelling the ink, while the black one had no issues.) So I stripped, washed, and converted the white mini. The side extensions are taken from a 1:144 ERTL Space Shuttle kit – the “wings” are cut from the LANDSAT’s solar panels (the texture sisn’t show up, alas), and the wingtip scanners are built up from one of the payload bay lab’s instruments.
Incidentally, the first model I ever put together was one of those shuttles, back in ’88. I still remember the heady stench of oranges and the huge number of fingerprints on the finished model. Played it to death. I got ahold of a pair more recently when a hobby shop went out of business and converted them into mini-Leopard dropships for Battletech..
This pic was taken right after the first, very dilute, wash.


IMG_20140809_235752_087The final product. Paint job was slightly improved after these pics were taken, adding in the port-side running lights and cleaning up the dome/base of bridge paint-job

IMG_20140810_241453_507

Img copyright Christie's: no challenge intended, displayed under the Fair Use doctrine for educational purposes.

Image copyright Christie’s: no challenge intended, displayed under the Fair Use doctrine for educational purposes.

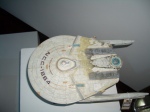
Compare to the “official” model for Heroclix/Attack Wing, and the original Reliant. The Saratoga mini was a re-dress of this miniature.

Progress update, Tales of the Black Widow project (Battletech)

Well, I had a progress update to post night before last. Then I dislocated my knee again (#17! YAAAAAAY!) and spent posting time in the ER and/or too high to write coherently. So, yeah. ‘Nuff about me.

Three nights ago, I did up a test ‘Mech for Santander’s Killers, an SHD-2D. I’m particularly proud of the cockpit jewelling. The color scheme is based on the old “Medium Lance” box cover; if you look closely, the Shad in the front has an emblem of the Santander V flag with crossed swords behind on a black diamond (Click for embiggitude). In addition, the only canon source on the colors of the Killers is some sidebar fiction where a Griff pilot describes silver and black ‘Mechs (generally, the first color named is the primary, with the other being a prominent detail color).Lisa - Medium Lance CoverCompare to:
IMG_20140608_155125_161

She still needs basing and decals, but I really like this scheme.
Cockpit jeweling is based on an old manga technique, using the “streaks” of brushmarks to get the layering down. First layer was a thin white streak along the lower and right edges and a small dot in the upper left. Next is a dark purple glaze, followed by a fast wet-blend using the dark and medium purples with a small amount of bone white. Took me about a minute, not counting the dry-time for the glaze.
As for the conversion, it’s another salvaged eBay plastic from 3e. The guy I got it from apparently tried the old lighter trick to burn off the excess vinyl flash, but only partially melted the side of the head and damaged the guns. The current arm lasers, LRM drum, and cannon are recast off of one of those Gashapon I picked up last month, while the (damaged) backpack is original, with a sculpted ammo pack on the left side to replace the damage from Bubba the ‘Mech Abuser.

Why did I pick what’s almost universally regarded as one of the shittiest ‘Mechs in BattleTech? Well, it’s a spike damage-dealer used for ambushes (piratical); the leader of the Killers, the pirate-king Halmar Valasek, is from the Federated Suns (who developed the modification); and damnit, it looks kind of cool.

More Trek Ships

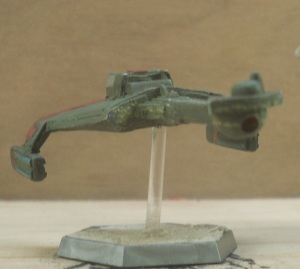
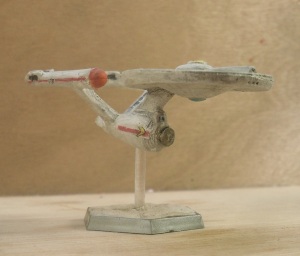
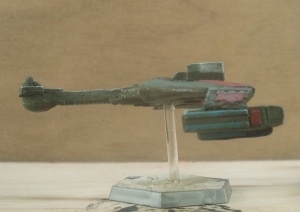
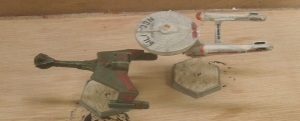
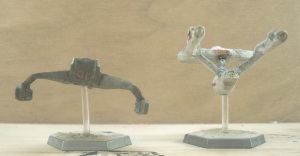
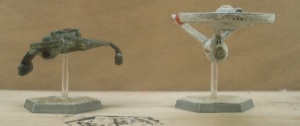
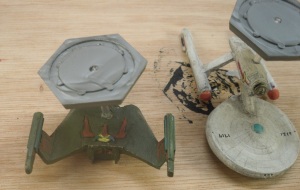
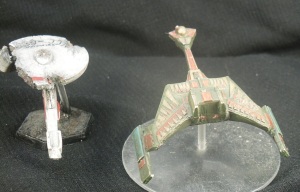
Not my best work with a brush. I hope the frigging hand cramps stop soon – this took almost two days to paint. This is, believe it or not, the same Klingon ship design as the Q’t’inga in the last post. First I sanded and cut off most of the decorations, then rebuilt the engines. All windows and pennants are freehanded, and the Eagle has some serious resculpt work on her. The (unpainted..) hex bases are for SFB/FASA STSCS gaming; I’ve actually got a flying base mold with a cut-out hex that I can magnetize and mount them on if I need to play ACTA.

SDC10002 SDC10003
Beauty shots. I misaligned the Eagle’s accelerator cannon by about 1mm, which is enormous at this scale ><. I am actually proud of her pennants, but the engines just make me cringe. On the K-7, you can see the phaser cannon mounts at the edge of the primary wings, although the “glow” effect in the main primary-hull tube isn’t visible.

SDC10005
Here’s that engine mod I was talking about. Cut straight in about 1/2mm along the mold line on the engine, then sawed at a very slight angle until the engine rods were the right width. Repeated on all four sides, then carved the rear of the engine into that nifty hexagonal shape.

SDC10009 SDC10013 SDC10017 SDC10019Kicking that old-school Klink emblem. Note the impulse engines on the K-7’s arse – painting them on looked far too crap.
On the Eagle, the source materiel (the Clans of Andor supplement for Last Unicorn Games-Trek, which is not technically canon but both the book and its author were used heavily by the Enterprise writing staff) states that the ship’s armament was heavily-upgraded at the expense of crew facilities and “luxury” power. I chose to add an accelerator cannon (basically, a warp coil that fires a tac-nuke at about Warp 4) and a neck-mounted torpedo room to foreshadow the Enterprise-class refit; it has twin forward tubes and a single aft one. The warp engine intercoolers are also slightly enlarged. About the only thing that’s canon on her is the registry number..

Next up: a third K7 for the Klingon squadron, a Larson-class destroyer and a Loknar-class light cruiser.
I’ll start in on Romulans sometime next week; I’m gunning for a full squadron of early Warbirds, 2 “Science vessels”, and at least one wing of K-7s plus some classic Birds-of-Prey.

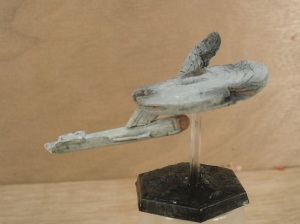
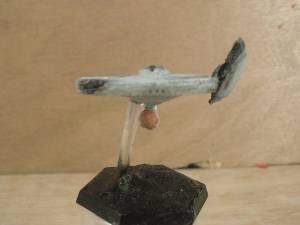
And a Q’t’inga! (Star Trek, Models)

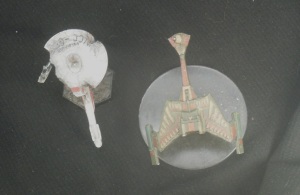
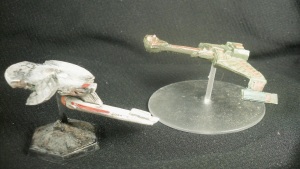
The destroyer is now marked, freehanded all, as “U.S.S. Draugr, NCC – 63[illegible]”. I also finished a Q’t’inga* cruiser, a Clix B’Moth that I painted loosely as Q’onoS Wa’ from Star Trek VI.  Paint job on this was a bit more involved, with a faint yellow wash over an OD Green basecoat, and antiqued gold/crimson highlights. I had to freehand the impulse engines, and added the engine rods on the really crappy warp nacelles. I also drilled the torpedo/disruptor cannon in the nose. There are windows on the neck, front of the secondary hull, and front of the primary, but unfortunately the camera box is washing it out when I use a black dropcloth. Will fiddle more with the settings over the next few days.

top

Her name is “Wam’dIj”

portside beauty stern
Currently on the desk are several more ships. There’s a much less ornate Q’t’inga* I’ve done up as a junior captain’s – carved and sanded off most of the battle honors on the hull – and I added in sculpted impulse engines and a little better detail on the nacelles. I also have a Constitution-class I’m doing up as the queen of the Andorian “Blue Fleet”; USS Eagle/Alirith, NCC-1719. Yes, I’m mixing LUG-Trek, FASA, and canon. No, you can’t stop me! :3
I’m also about halfway into sculpting a Larson-class destroyer escort (see here), possibly to be followed by several Loknar light cruisers and an Anton or two.

(*pronounced /k’?-tʰ?i-ŋə/, not /kə-tɪn-gə/ as I hear it waay too often. If this doesn’t make sense to you, I’m afraid I don’t have the microphone to assist you :/)

Shot-up Saladin (Star Trek, Painting)

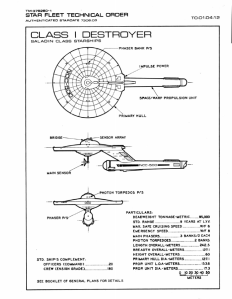
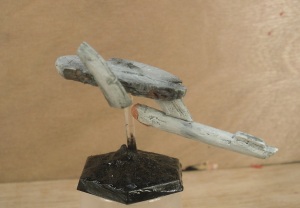
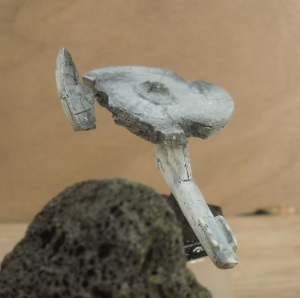
I’ve been modeling and painting, as promised. Here’s my latest project – a shot-up Saladin-class destroyer. For those of you not familiar with her, the class (also known as the “Akula”, particularly in the Movie-Era refit) originates in the Franz Joseph technical manual. The Saladin’s readout appears briefly on-screen in a couple of the movies, making her technically canon.

Saladin-class destroyer, from Franz Joseph's "almost-canon" Star Fleet Technical Manual

Saladin-class destroyer, from Franz Joseph’s “almost-canon” Star Fleet Technical Manual

My version still needs plasma vents in the neck, the deflector dish, and of course some registry numbers. On the other hand, I fixed my camera and rigged up a slightly different iteration of the camera box, which seems to be treating me pretty well.
Saladin port shot

Saladin ass shot

Saladin Starboad shot

Saladin nose shotI might go back and tear up the port-side torpedo launcher (on the front of the “bridge island” on the saucer), but this is basically complete. Note the fires visible in the port and starboard views; she’s clearly still got a few SIFs online, but either a torp blew under the command decks, or she took a shot to the dome.

To create the “deck” effect I cut a loose, ragged edge with a vertical knife, then cut horizontally into it, tearing out small chunks and flaking apart the dish. The floating saucer section is held with a short length of florist’s wire. The base is made with JB Weld Kwik Wood, press-molded with a chunk of pumice, on a chessex hexbase and using a piece of clear sprue as a support (it enters a drilled hole in the saucer, very nearly at the balance point).

As far as paint, it’s a fairly simple five-coat job, with two layers of thinned grey primer followed by a heavy white drybrush, magic-wash, and a light white brush. Weathering is neon orange, with brown drybrushed over the blast areas followed by a dried-brush black stipple.

Battletech sculpting/conversion update.

Got some ‘Mech modeling done over the last few days. First off, I got sick of the heavy-duty sculpting work I’ve been pushing the last few weeks, and started on a lance of Donegal Guards – specifically the 17th Donegal. They’re set up to be legal for play from the early Star League all the way through to post-Jihad, and most of the designs are acceptable in the late Age Of War.

L-R: COM-1D, BNC-3S, WVR-6R, LCT-1S

L-R: COM-1D, BNC-3S, WVR-6R, LCT-1S

Composition: BNC (Steiner variants), Locust (1-S), Commando (-1 series), Wolverine (Stock, can use minor variants and upgrades). Runs just shy of 4k BV, or 4500 with the Jihad-era variants. Basic idea is, the WVR hangs back with the Banshee while the Locust and Commando zig-zag across the line of advance. When they find a target, the Commando falls back to snipe and bodyguard the ‘Shee as it advances to engage, while the Wolvie and Locust flank the target and pressure it. Been experimenting with loading the Commando with Inferno rounds so it can set fires and deal with vees, but I never manage to use them up in a fight. The strategy seems to work okay in Megamek, although the lance is a good bit more explosive than I’m usually comfortable with. I’m really proud that I managed to keep resupply easy (only 3 different types of ammo, and mostly they eat up 6-packs of SRM like Skittles), and still kept a reasonable theme going.

All are converted plastics from the boxed sets, as follows:
• The Commando uses the laser designator from a 1/72 Apache’s Hellfire rack. I integrated it with the recarved SRM wrist rack.
• Banshee: Sculpted SRM rack, with a heat sink in the back. Drilled gunbarrels in the waist, added a salvaged Whammy arm from my adventures in ebaying 3e plastics.
• Wolverine: Didn’t like the way it was clearly facing the wrong side of the base, so sawed and pinned the waist. Minor GS work to fix a miscast on the back.
• Locust: Cut out the center “barrels” on the arms, drilled the bottom and added a quick-and-dirty paperclip and GS laser. Top barrel sanded round, will be jeweling it as a laser lens for the SLs later. Cut off the underslung Martell, saving it for a Taurian locust conversion later (over-under linked barrels. It’ll look great or completely shite).

Pic is after 1hr of painting. I managed both base and highlight coats on the three painted ‘Mechs, but didn’t have time to ink the Bug or work on the Wolverine. I really need to fix that sloppy-ass highlight on the Banshee’s barrel, too.

I’ve also resumed my “unfuck the 5e boxed set” project. Everything from simple reposes (Panther, Jaegermech, Vindicators) to model changing (Clint -> Clint IIC for my Spirits), heavy-duty reposes (Jenner, Dragon), and weapon swaps/sculpting (Banshee, Zeuses).
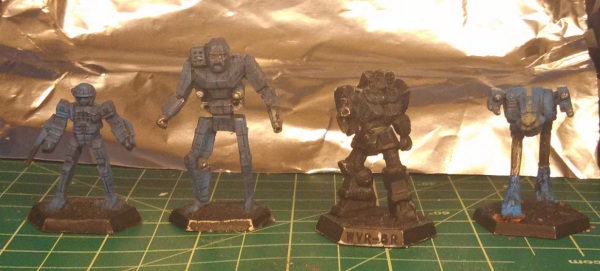
Boxed Set Mods #1Working from Left to Right;
• The Hunchback was a simple gun cleanup; the other one I own is in the midst of a Swayback (SRM) transition.
• Panther: a simple saw-and-pin on the arm.
• Dragon: heavily reposed, rebased, and guns drilled. It’s still waiting on radio antenna and a reworked arm laser before it sees primer. I loosely based its pose on an old illustration I have somewhere.
• Whitworth: Arms reposed, with the lasers respositioned to the correct angle and the micro-missile box on the left arm beefed up to better proportions. Still debating whether to make the missile hatches open or closed.
•  Clint: just started its rebuild; still needs a hand actuator and a head/arm/leg repose to match the Loose illo in 3060.
• The primed Zeus is one of my earliest gun rebuilds in the scale, and needs a little rework now that I’m more comfortable. Its unprimed sister is set to become the ZEU-6Y experimental model from the Succession Wars, because I am a whore for Blazers.
• The Jaegermech has had the barrels cut, rotated, and pinned. I can’t find my JM-6A conversion right now, alas.

There are several more conversions on the way, with six 3e plastic ‘Mechs waiting for primer and another five 5e models, but I felt like throwing these up to remind myself I’m making progress. Especially with the Thunderbolt’s reactive armor still kicking my ass.

Definitely not using the foil backdrop again, though, yellowed the fuck out of my pics. Time to try postcards, I think…

Start of something awesome (Gundam 1/400)

I’m still writing up my full review of Better Than Any Man, so for the meantime…
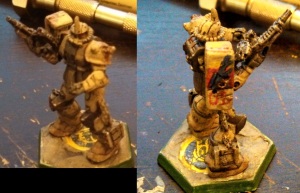
I finally got my bloody casting rig working again. You may not know this, but there are actually several different Gundam gashapon (basically, really nice quarter-machine toys) wargame systems running around. You can find one here (Facebook group, translated rules and unit cards in the files section), as well as the forever-teased, never-released Gundam Senki*. I need a lot more masters to add to my collection, but I’ve started my first MS team. These guys are late-war remnants, ala the Midnight Fenrir battalion but not nearly so well-equipped. Yet. They’ll form the core of a battalion (possibly regiment?) in the future. And of course, what good are Zakus without GMs to blow up?
IMG_20130623_244433_156
This particular gent is Michael vanOrden, my perpetual 3iC and recon team leader in mecha roleplaying ‘verses; his wife Maria is usually XO and the team’s Assault leader. “Doc” Schott’s custom recovery Zaku is gonna take a while to pull off, and I don’t have any Doms to do up a Funf for Maria yet, so in the meantime I’m doing Third (Blue) Team. Squadron name is the “Sunset Chasers”. I’ll have better pics up later, but I wanted to get something out there. Also, Magic Wash is Magic.

*Mike from R. Talsorian has floated the idea of doing a kickstarter for it once the Mekton one is over. I drool with anticipation, but.. after all the shit I’ve been through waiting for it, I’m a little cynical.