Model Review: 1:288 (6mm) Eastern Express Antonov AN-71 “Madcap” AWACS

Summary:
The EE Antonov AN-71 is a fun, quick little build that will look fine as a gaming piece. Probably not the best overall choice for a “serious” micro-mini modeler, who will be screaming and flinging it out the window within minutes. 1:288/6mm scale makes it compatible with quite a few wargames, including Micro Armor, Fistful of TOWs, Battletech, and Robotech RPG Tactics. The limited historical deployment of this particular aircraft will hurt its utility for historical gamers, but other models in the series would likely serve them much better.
For Robotech Tactics modelers, the AN-71 is also an excellent base for an alternate version of the ES-11D “Cat’s Eye” recon – one of the guys on the Robotech Tactics Facebook group did up a conversion you can see here if you’re a group member.

Background:
First off – a little history. In 1984-ish, the Antonov company put together a bid for a new AWACS version of the AN-72 light transport airframe (NATO callsign “COALER”). It was intended to vector in ground-attack forces at the tactical level (taking the load off of the larger “MAINSTAY” and “MOSS”, which were busy handling strategic responses and combat air patrol), while taking advantage of the AN-72 airframe’s ability to make use of short, poor-quality runways and improvised airfields. While loosely equivalent to the role of an E2-C Hawkeye in USN service, the AN-71 was supposed to be a land-based design (the naval role was supposed to be taken by the Yakolev YAK-44, which never surfaced).  NATO assigned the bird the reporting name “MADCAP” after its first flight in 1985. Unfortunately, the USSR only ever made three AN-71 airframes before the economic collapses of 1986-88 killed the program. One of those three prototypes was shipped off to the Ukraine for their new Air and Space museum while they were in the process of seceding from the SSSR, which is why this particular model was originally Ukraininan.The Eastern Express company put out a series of models based on the Museum’s holdings, all nominally in 1:288 scale. Toko seems to have put out a version of the series as well, and you can find a box in the US from Imex (I got mine on the ‘bay for $4, so always check your supplier..)

The AN-71 herself is pretty unique – a STOL design that uses engine exhaust to increase lift over the wings. Unfortunately this design, while efficient, tends to be damned noisy for the poor saps inside the cargo bay, but hey. Whatcha gonna do? *(cancel it if you’re Boeing, of course. Keep using it for fifty-plus years if you’re a Russkie..)

Surviving AN-71 on display in the Ukraine

The Good: Simple, clean instructions. Good decals, although I have no need for them. Generally decent fit and polish on the kit.
The Bad: Lots and lots of flash on frame “A”. It cleaned up well after a quick pass with an emery board. Some gates on detail elements distorted the radome and tail. Shallow detail cuts had to be sharpened.
The Ugly: Does not include any parts to make closed landing gear bays. The engine mounting surfaces were poorly-designed, and the wing overall required a lot of work to mount.
Full model build/review under the cut. My apologies for the poor quality of a couple of the images -I plead being sick as hell and having a shit phone.

(more…)

The Device [Terrain-making]

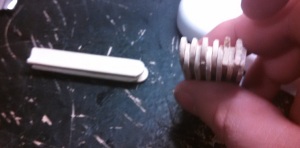
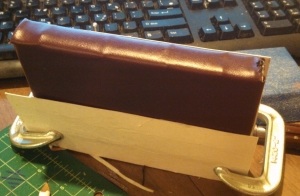
Basically, I got tired of dealing with simulating all of my corrugated tin/steel with cardboard. It looks.. okay. But it’s not very sturdy, and it’s all fuzzy and shit. So, a while ago I realized I could use all the pop cans I had lying around the house if I could find a way of corrugating them. What did I have? Popsicle sticks. So I tried an alternating arrangement, which worked.. sort of. With a lot of work.

Version one

Version one

This one was, of course, hilariously unsafe. Something about rubbing small sticks right together vigorously next to a sharp-ass metal edge. I did use the test pieces to make that shack a couple weeks ago, though. In the ensuing weeks I’ve gone through a couple iterations, and finally put together something that requires about the same amount of work but far less filing. Or risk of severe finger injury.
Directions below the cut.
(more…)

Making 28mm Asphalt Roads [Modern/Post-Apoc]

Following on from a post over at Tabletop-Terrain about making roads with self-adhesive floor-tiles, I swung by the Home Depot (gotta love that 10% veteran’s discount) and picked up a sample of this shit – TrafficMaster “light brown travertine” SA vinyl. Given that it’s running less than $1/square foot, and each square foot makes two 12″x6″ road sections, this is going to be a about half the price of my previous favorite option – Ikea “Avskild” cork placemats.

Before I break down the advantages of each, I figured I’d put up a quick shot to show you the texture of the vinyl tiles versus the cork.
• Ikea Cork sheeting, painted as concrete (from the Airbase Toblerone project).
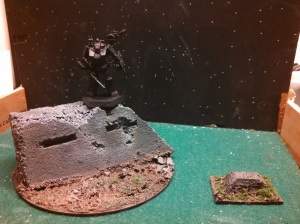
IMG_20160605_213622_431
As you can see, it’s got a pretty fine texture, even on the smaller bunker. Good for concrete, but it’s not really my favorite on the asphalt front. The surface tearing is nice and chunky, and the edges wear pretty well.
Unfortunately, I don’t have any pics of the commissioned road set I did a few years ago, but we’ll go over my experience with them below.

•Trafficmaster tile, inked and uncut (I just slapped some India ink on with a wet rag and took a photo here without cleaning the tile first: the pale spots appear to be greasy areas from previous handling..).

img_20161030_151202_887Here we’ve got a much more irregular surface, and it’s already very reminiscent of weathered asphalt even with the pale spots and brown undertone. It is, however, a thin sheet of plastic – less than .25mm – laid over a ~1.5mm rubber sheet. That may make larger areas of surface damage look less realistic unless I cut out the undersurface and hammer the surface plastic down into the “damage” pattern, or fill them with basing ballast.

So, what’s my take so far?

Cork sheeting

Advantages –
Realistic surface damage (for both asphalt and concrete). It’s easy to sink in some paper clip wire to simulate rebar on a broken section, or a small piece of low-gauge copper cable/plastic pipe for other conduits, which dresses up the edges nicely.

Multi-purpose. Crumbled scrap bits make great rubble. You can face a chunk of foamcore or stiff card with the cork and get a plastered concrete surface in minutes – one that’s also easy to trash and make look good.

Super-easy to work. Cutting, fitting, and weathering the cork bits for both of the pieces in the pic above took me about two minutes.

Cheap. Granted, both of the materials have that going for them, but it bears repeating; this stuff costs about 75c/ft^2.  In other formats, unfortunately, that’s not so true – a straight-up roll of cork from a craft or art store can be more along the lines of $5/ft^2.  And there’s a certain amount of wasted material because of the rounded edges of the Ikea stuff and the weird size.

Disadvantages –
Poor surface sealing coupled with moisture sensitivity. You have to paint PVA or another sealant onto cork, or it has a nasty tendency to swell. That flakes off paint. It also behaves oddly when painted unless you seal it – soaking in some colors, repelling others, and generally being a pain in the ass. Plus, again, it can swell or crumble without sealant while you’re painting it, screwing up your effects or damaging the piece.

Fragility – the same thing that makes it easy to work makes it hard to store. Cork works best as a facing on top of another material, like heavy card or styrofoam. In storage, dropping or bumping the container can shatter off a large chunk of cork, and the pieces frotting against each other in the box will not just wear the paint but tear chunks out. That means you need padded storage and rigid containment, which reduces the amount of stuff you can store in a given space. With roads it’s less of a problem – you can wrap them in cheap felt and glue a sheet of craft foam to the edges of the box – but storing a large building is a >massive< pain in the ass

It just doesn’t look like asphalt at larger scales. With a good paintjob, you can pass it off pretty well at 6-10mm, and I’ve seen some guys make 15mm look decent, but at 28+ it looks like shit unless you work it as concrete. How many cities or highways do you know of that use concrete for the roads? Yeah. It’s fine for sidewalks and warehouse floors, but not roads.

Vinyl Tile

Advantages –
Tough as hell. I did a few experiments with a painted chunk, slapping it edge-on against a desk and flapping the piece back and forth. Paint held well, and even the section I stripped the vinyl from seemed to be doing okay. Unfortunately, rubbing the painted sides together did do some paint damage, so I’ll still need surface protection, but rubbing gently with stiff, sealed card didn’t do too much damage. I think I may be able to get away with just peeling and sticking the flooring sheets onto posterboard and using that as layer protection; for more on that, see “conclusions” below.

Great surface texture. I mean, look at that pic again. That’s literally a thirty-second swipe of india ink – not a damn lick of paint – and it already looks like a road.

The sheets are a better shape and size than the Ikea mats I’ve been using, which means there’s less waste. Basically with cork I got two 6″x16″ chunks of straight road, or two 12″x8″ sections. Lots of room for a shoulder, but the roads also wound up looking unrealistically wide compared to 1:43 or 1:48 cars (let alone the figs). Of course, I could trim off that extra couple inches on each side and use to make sidewalks and curbs or building parts, which was pretty cool. With the vinyl I get four 6″x12″ straights, nearly quadrupling the yield per dollar spent.

On that note, the sheets are even cheaper than cork, especially in bulk; I can get ten 1’x2′ sheets for under twenty bucks. So for the same $20 I can get either ten sections of road with sidewalks/shoulders, plus 2 intersections per road section I drop, or forty sections without sidewalks. Sections that require less reinforcement and storage area.

Properly painted, it also looks like facing stones. With a little work, it’d be great for adding a “sandstone” texture to the lower floors of Foamcore ruins, which means I still have an outlet for scraps. Cork does have an advantage, though, in that crumbled bits of cork will look great just tossed on a rubble pile, where this will require trimmed and (roughly) squared sections of the scrap rather than “whatever’s left”

Disadvantages –
Heavier, by a substantial margin. Each sheet weighs about half again as much as one of the placemats, making it harder to transport on foot/bus.

Harder to weather and simulate surface damage – as I mentioned above, just picking the surface off reveals a chunk of rubber, which has a terrible texture. So you have to backfill the holes with basing ballast, or find some other way of getting an interesting texture instead of smooth cuts. That adds working time as well, which seems to be compensating for not needing to seal each individual piece.

Harder to work – This shit is dulling the HELL out of my boxcutter, and straight-up snapped a #11 Exacto blade within 5 cuts. It’s also tearing the shit out of my leatherworking swivel knife, which is why the boxcutter is getting an outing. I also can’t slap it up on the deck of my paper-cutter to just slice off straight sections, which means breaking out the rulers, square, and compass.

Floppy – A disadvantage both share, but the higher weight of the sheeting makes it more noticeable. I’m gonna need to give these a stiffer backing to keep the paint on, even if it held reasonably well in the basic tests.

Surprise contestant:
EVA (Craft) Foam
Advantages:
Easy to work, soft, multi-purpose.

Disadvantages:
Poor surface texture, floppy, fragile, and more expensive than either. Worse, it’s sensitive to heat and to spraypaint, so it’ll need sealing.

ConclusionsI’ll definitely keep using cork for my own street/postapoc projects, but I’m about to add a lot more vinyl to my toolbox. Given the properties of both, I’m thinking of using an 8″ wide strip of black posterboard, with the vinyl laid on top (using its own adhesive) as a road bed and either cork sidewalks or ballast to simulate gravel shoulders. I could also take strips of foamcore and cut out roadbeds from the center ( just leaving the bottom layer of card), and mark up curbs/sidewalks onto the raised edge sections. The foamcore method is almost certainly going to be the way to go if I’m making bridges/overpasses, unless I can convince that guy in the Makerspace to let me use his laser cutter on some MDF or hork up for the Hirst Arts bridge mold..

Quick, Cheap Skirmish Horde Basing; or, How I Learned to Stop Worrying and Love the Hole Saw.

So, one of the problems you’re inevitably going to face as a wargamer is simple – you’re gonna run out of bases one day. A lot of companies sell their minis with “integral” display bases that aren’t worth a damn. Especially the cheap shit – Wargames Factory, Reaper, lookin’ at you here. And of course, these aren’t cut to fit on GW’s patented slotted base. The hole’s easy to cover, but still more of a pain that you really want to deal with – not now that GW is charging in excess of a buck a base, anyway.

So I’ve started manufacturing my own, at least for the “horde” models. I put together this tutorial to help you make your own quick, cheap bases in large quantities. Short version is, forty bases cost me ~$2.15 using existing tools (about $30 worth). It’s about the same price as mail-ordering MDF stuff, but you get it now and don’t have to pay shipping..
Tutorial below the cut.
(more…)

Shack! [Post-apoc terrain]

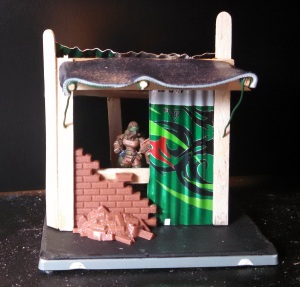
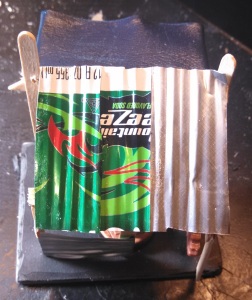
I have invented a device for turning pop cans into scale-correct corrugated iron sheets. It is made from popsicle sticks. I’ve done up a quickie sample shack with the prototype. Plans will go up once I refine it into something a little less-dangerous and labor-intensive.

shackpix-1 shackpix-2

Reversing the Apocalypse: “Un-ruining” the Mantic 28mm Brick terrain set

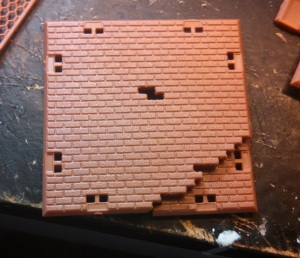
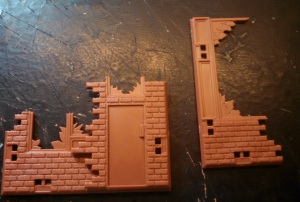
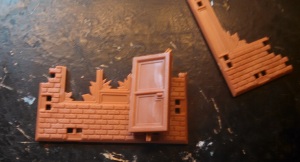
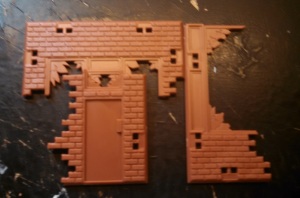
I picked up the Mars Attacks! brick ruin terrain boxed set a year or so ago, while I was on my last Fallout kick. The sci-fi kits they put out were pretty cool, and I liked the way those fit together, so I snagged a couple of the MA! ruins boxes on sale from the LGS, hoping they’d fit the good old zeerusty Fallout aesthetic. They were.. not the most impressive. A couple of connectors snapped off while I was doing test fitting, and there were a huge number of “samey” pieces of ruin. That tends to make everything look a little too planned for a crumbling town (in particular, the three identical un-shattered glass doors, and all the identically-busted windows). The clip-together system also leaves huge unsightly gaps between pieces, and glaring holes in the models’ texture that would require filling. Plus they were a garish salmon-orange-pink. So I knew that if I put these together I’d either hate them or have to give up on the modularity that was supposed to be the kit’s selling point.

Instead of doing either, I got annoyed with it in the planning stage and stashed it in the back of my closet with the rest of my unloved but usable gaming crap.

Today I’ve been inspired by the work of the gent over on Tabletop Terrain to give my 20th-C brick a second look (he’s got a couple of really cool posts through that link showing his own work on it). He fixed the gapping problems and the clip-holes quite handily. As I said, however, the biggest thing that bugged me personally was the uniformity of the busted bits, along with how small most of the pieces are. Some are barely big enough to make a blasted corner sticking up out of the rubble, and only have 1-2 clip holes. That makes building walls and linear terrain much harder. Plus, I want a couple of vaguely intact buildings to fuck about in. The best part about Necromunda and Mordheim was always the massive, multi-level terrainscape; I want to get some of that feel with my own This is Not a Test tables. I know Mantic offers actual un-ruined sets, but most of them don’t actually give me anything over what I already have. In particular, the roof tiles look shit and they have no models with plain, open windows – everything’s a thin layer of tough, orange plastic I’d have to saw out anyway. I might pick up their Convenience Store for the windows, but really their setup is pretty janky and this is more about salvaging and getting the most out of what I have. Kinda appropriate for a post-apocalyptic project, if you think about it..

So I set about restoring what bits I have and planning out new ones – the roofs are going to have to wait for a bit.

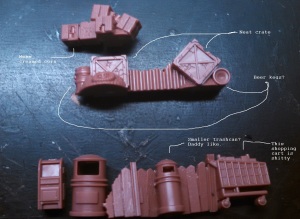
One of the first things I noticed was that the “Accessories” sprue has some pretty cool bits on it that aren’t actually on any of the buildings Mantic offers – a different dustbin, beer kegs, a better-looking paneled door – so I plan to might wind up separating a few of those off and repairing/recasting them for scatter terrain. That door is >definitely< going under rubber, although I’m going to have to make it as a “face” mold since the other side is covered by crates and reinforcements.

accessories-linear-terrain-annotated

Annotated to show some of the nifty salvageable bits here

accessories-cool-door-in-barricade

Almost the same size, and you can’t tell me this isn’t cooler…

The park benches are too difficult to cast, and I can make my own, better-looking ones more quickly and cheaply with coffee stirrers and wire anyway, but the road signs and 50s-style lamps are badass.

I also did a basic repair on the main panel.

I had the sneaking suspicion that one of the smaller “ruin” pieces would match up fairly closely to the missing chunks of the largest panel. None of them did exactly, but a couple were pretty close. This was the best fit.
main-panel-tracing
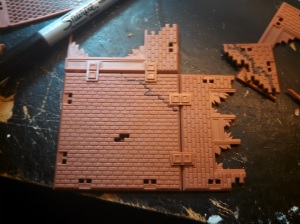
I traced the outline of the larger wall on it with a sharpie and got to work with the ol’ razor saw (this stuff is a little too stiff to cut with the X-acto, although my heavy boxcutter is decent for trimming), and an emery board.
main-panel-traced

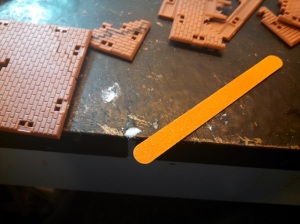
These things are the shit, kids. $1.50 for fifteen, and they're wide, straight, flat, and flexible.

These things are the shit, kids. $1.50 for fifteen, and they’re wide, straight, flat, and flexible.

Anyway, I sanded until the model hit a decent temporary fit, then clamped it into a pair of other walls as an alignment jig and sanded until it fit cleanly and without real effort before I glued it. I also lightly sanded the surface of the piece – like a lot of these hard-plastic wargaming models, it warped slightly while cooling and I want the recasts to be as clean as possible.

main-panel-fit-and-glueNext up is making a quick-and-dirty epoxy mold to transfer and repair the brick texture from the other side and replace the two bricks in the middle.

After that I have a couple of ideas, but given how shitty this plastic is to work with I think I may just cast up quick-and-shitty molds of the main unique wall sections instead of building off of what I have.

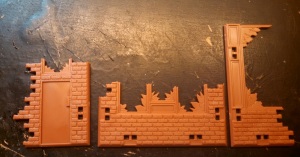
Said larger bits of ruin

Said larger bits of ruin

One of the cooler things is that the door piece aligns in a couple of different ways with the window-walls. With proper castings and a little elbow grease these ought to break up a lot of the monotony of the set.

Side alignment with two full-height windows

Side alignment with two full-height windows

Side alignment with the paneled door

Side alignment with the paneled door

Center alignment with two small windows above the door.

Center alignment with two small windows above the door.

The bay window will be kind of a bitch, but at least I can get my brownstone on in a reasonably attractive manner. Floors will be super easy, just joisted coffee stirrers with a little filler on top, and I think can get away with using the floor separators as a frame to hold on upper levels since I’m not going to be using the Mantic clips to hold the structures together.  Given my ongoing mold hold-out rates, this ought to give me enough casts for a couple reasonably-sized buildings to play in and beat the shit out of in a slightly less-regular manner than they probably intended.

Sculpting again – Robotech Tactics

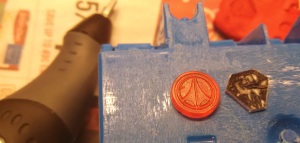
I was annoyed by the lack of Malcontent command chips, so I started sculpting my own this afternoon. So far, I’ve got about 20-30 minutes of work into it. I freehanded the base shape onto paper using a UEDF chip as a size comparison, sketched the design onto it loosely with a Micron .005, and then freehanded from that with my engraver (picked on up free from one of the Makerspace guys who was ditching it after getting a laser engraver).

After cutting the base chip and freehanding the Malcontent logo on there with the Dremel - ~5m.

After cutting the base chip and freehanding the Malcontent logo on there with the Dremel – ~5m.

Next, I mixed a tiny amount of Green Stuff and worked it onto the design.
Step three - 10 MinTook about 10 minutes so far. I’m pretty proud of the detail on the Valkyrie tail, especially since it’s less than 1mm tall.

Now I gotta wait until after my volunteering shift at the local film society to throw another layer of GS on there, but it’s already looking damned good. I’m probably gonna be in shape to drop rubber on these by the time I can afford to buy more. Eventual plan is to cast off a pair of masters, sand the backs down slightly, and then glue them together and install a thin rim instead of trying to do this thing double-sided. All told, should take me about an hour’s actual work to get a mold going, maybe another 40 minutes total to set up a full mass-production rig.
Not, of course, that I’d MP these. But Jesus, Palladium, it’d take a pro sculptor less than a fucking day to set this up and GHQ could be pumping them out by the thousands in less than a week. Hell, you already have masters for the UEDF and Zent chips, put them under some rubber and give us enough to actually play with…

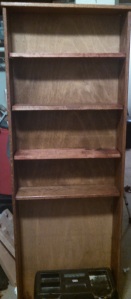
I made a bookcase today.

Salvaged a broken, but good-quality bookcase (made with actual wood and quarter-round molding, I might add) from the side of the road last month. Bleached it to neutralize any mold/acids in the wood, cleaned it up, sanded off the ruined old finish, and cut/stained new shelves. Cost me about $8 in materials to restore her. Letting it dry overnight before I seal it with polyurethane and put books/models on it. So, got a ~$60-100 bookcase now for about ten bucks and six or seven hour’s labour. Most of which was literally letting paint dry.

Yup, it's a bookcase

Yup, it’s a bookcase

yet another quick update.

Nothing super big going on for the last two days, just a lot of micro-progress. Still, I’m trying to publish at least once every two days right now, so here ya go.

As far as the ongoing cleanup goes, I sorted out the last of my terrain and materials into boxes, cleaning out and consolidating my three unsorted boxes of minis into one coherent whole. Still need another three to four plastic shoeboxes to finish storing everything (I need to sort the Mars Attacks suburbs and generic post-apoc terrain into its own box and clear out the big shoebox currently full of modular Necromunda and Russian industrial terrain so I can put my Space Hulk set into it). Bases are sorted for now as well, but I need to replace or repair the current Plamo case they’re in – the hinges on the lid shattered from UV degradation.

Less impressive-looking than perhaps it is. Top to bottom: Bases, Fantasy, Post-apoc, Warzone, Light Vehicles and Mecha. Gundams to the left, IG and moderns to the right.

Less impressive-looking than perhaps it is. Top to bottom: Bases, Fantasy, Post-apoc, Warzone, Light Vehicles and Mecha. Gundams to the left, IG and moderns to the right.

On the modeling front, I cleaned up, converted, and posed a Stalker, Wasp, and two RRPGT Valkyries, and did a photoshoot for my long-delayed review of the Destroid Tomahawk (which I need to finish now so that I can start on a Secret Project [tm]).

no soup for you

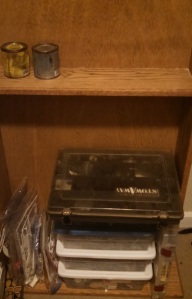
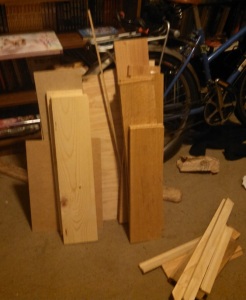
Finally, I’ve gotten the last bits of wood I need to do the paint shelf and finish restoring a bookcase I salvaged last month, so tomorrow’s gonna be a carpentry day.

About to be a couple of far more-impressive things.

About to be a couple of far more-impressive things.

Then I’m having guests for dinner. Should be a lot of fun.

Pirate conversions, and more Black Widow work (TotBWC, Battletech)

So, I’ve been much more productive these last couple of months than usual. Part of it’s getting on the right meds for a change, part of it’s completing the better part of a year’s worth of therapy for my ADHD. Now I’ve got time to work on something other than fixing my headspace, I’ve been working my ass off on my project backlogs. It hasn’t really made it onto the blog, since a lot of my projects have just been aimed at unfucking my house or otherwise not hobby-related, and I haven’t been in the mood to write for a while either. But now it’s too hot for carpentry, so back to the keyboard we go.

Right now I’m working on my massive post queue; I kept starting posts and then abandoning them to the ether after twenty minutes over the last year or so, and now I’m going back and finishing them – or adding on the stuff that I quit writing to do and never got done.

This is one of those posts – a selection of the ‘Mechs I converted/prepped/repaired in the course of three days back in June. I had to pull a couple back for QC (like the Bounty Hunter), but it was a lot of fun.

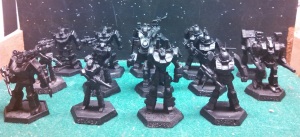
Overall production

Left to right, front to back:
Front row: SHD-2D “Vang” custom Shadow Hawk (This one is a little surprise for the mission “Leave No Survivors“; check below the break for the tech readout. It’s a beast), Stinger, Crusader, converted GRF-1S “Steiner”.
Second Row: Stinger, converted Wasp (left-handed, with a Recon Camera, two Vehicular Grenade Launchers, and a Small Laser replacing the missile system), an ICE Thunderbolt (modified from Steve’s design in 3063, see below the cut), a dressed-up Griffin with a Dougram Bushmaster’s linear gun, and a stock WHM-6R for the Santander Killers.
Third Row: two stock Wolverines, plus a Shadow Hawk converted to a Wolverine standard. See below for the parts breakdown. After that there’s another upgunned Griffin and a reposed and cut-down Stalker for the pirates (I’m using the stats for the lightened 80-tonner with it).

IMG_20160605_213303_957Detail pics:
Here’s some slightly better shots of the four who do me proudest.
SHD-2D “Vang”: Added another Dougram light Linear gun (the ML on the Shadow Hawk) from my gashapon collection, and put on a light SRM from the same source. The over-the-shoulder gun is the Large Laser I took from the Thunderbolt, mounted on a small part from a MW Clix mini. I recarved the area next to the head to remove the original grenade pack and plugged the SRM holes in its “collarbone”.

SHD-2 “NISE* Wolverine”: So, I’ve always disliked the way the Wolverine looks (heresy, I know. Shut up.). I scored a 3e plastic Shad on Ebay for $1 since the backpack gun was damaged and the laser had broken off. And I figured “Why the hell not? Someone’s gotta get a Command ‘Mech out of this, and pirates seem like the folks to do it”. First I rebarreled the arm laser with a bit of wire and some Green Stuff, then added a spare Command Destroid pack to the back in place of the AC. I mated the AC receiver to a barrel cut from scrap from a WH40 Basilisk fighting platform railing and a short magazine made from plasticard, then mounted it under the fore-arm. It’s hard to see, but there’s a small finger guard attached to the hand-grip. The missile rack is a carefully re-cut pair of SRMs from a JES-1 carrier. I also filed off the VGL mount on this one, but left the gap clear for the backpack SRM to shoot through.
This is going to be the leader for Recce lance of 2 Coy, Santander’s Killers.
*From the Gundam fandom. Refers to a “mocked up” or faked version of a ‘Mech using another’s chassis; the original NISE Gundam used a GM chassis.

TDR-6FX1: I like diesel Thuds. You like Diesel Thuds. We all like ’em. So this was an easy rebuild choice for another E-Bay rescue Thud. The shoulder mount is a pair of Dougram Linear guns, cut down and reinforced, with a Locust-like arm pod made from plasticard and a plastic rod. The arm got a Wolverine hand-gun from a WVR-6M conversion I did ages ago for a buyer, plus a shield from an MS-06F Zaku II that I had converted to a Zaku I. The smokestacks are made from sprues, and I sculpted a simple engine and heat sink into the back (as well as the laser pack space in the front). Given that these things are supposed to be like forty years old by the late Jihad, I busted her up a little bit too.

GRF-1S: This is a simple up-gunning, using components from a Roundfacer “Korchima Special” as well as a RRPGT Defender radome and some cord.First I cut away the shitter guns that come with the vinyl 3e minis, then carefully sawed in the detail on the legs and re-carved/sculpted the shoulder and side of the head. I added a small “reactor pack” on the back using a casting taken from a AAA battery, and wired it up to a recast Roundfacer gun. I tried a couple different components to dress up the other side of the pack, but the radome just seemed to fit so well. On the other side, I’ve mounted a smaller missile launcher, taken from a Dougram gashapon. Oddly, given how much time and effort I sunk into the others this one is still my favorite-looking.


The Future:

Painting to come once I finish allocating to the various forces in the book, though I already have homes for the Stalker, “NISE” Wolverine (both to the Killers), Thud (Canopian militia), Stingers, Vang’s SHD (Draconis March Militia), and Griffins (One each to the Donegal Guards, Killers, and Black Widows). On the shelf I’ve got some converted Archers, Pixies, the Bounty Hunter (3015), a few Valks, and the Dougram gashapon to fiddle with, plus a fuckton of vees.

Record sheets:
Below the cut, with some quick commentary on the design process and ideas behind them.
(more…)

Desk Organization System (DiY)

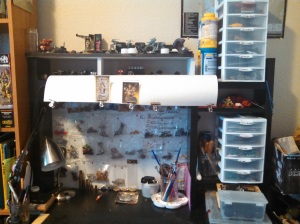
IMG_20160810_131249_686I wound up putting a lot of projects on hold over the last couple weeks so I could do this. I’ve put together a new top shelf for my desk to expand my storage space, and I’m also working on a paint rack to free up one of my toolboxes for all of my new gear. I’ve been talking shit about fixing the desk for over two years, and the overwhelming clutter has been holding me back from doing a lot of other stuff. It feels damned good to have this done.
Below the fold, I talk about the tools and equipment I used to make the shelf, but all told this cost me almost nothing and presents a substantial improvement over the absolute wreck I had before.

(more…)

Props, general update

I’ve been hellaciously busy the last month and change. First I did a crash commission for a cosplayer friend at PAX Prime, then I got roped into working Kumoricon with almost no notice, and I’ve just finished working on Theater Artists Olympia’s reprise of their original musical “The HEAD! That Wouldn’t Die“. More on that later.

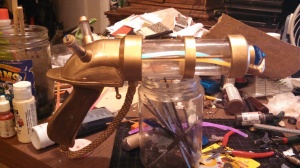
First prop: Jinx’s Zapper (League of Legends).
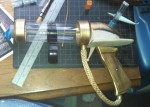
There are only a handful of “official” images of the Zapper, so I was forced to make do with a couple promo images that showed the handle, and what I could glean from in-game footage.

Materials:
1.5″ pipe fittings, hangar wire, 1/2″ nylon cabling, plastic, a couple found items, a soda bottle, acrylic gem, 1/2″ nylon tubing, a maple 1×2″ board, and plywood.
Jinx zapper day 3
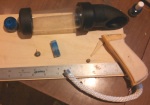
First shot I have of the build process, taken at the beginning of Day 3. This is all the parts assembles. You can see that I’ve outlined a tentative grip shape here, as well as carving the grip shape and trigger out. All of this would have taken half an hour with a Dremel, but I was working with a shitty hand-saw and sanding blocks.

Jinx Zapper day 4
Day 4.
A test design for the light-up vacuum tubes, along with fitted grips and a mounted hand-guard. The acryl gem is colored using a trick I picked up ages ago from another builder – if you put nail polish on one side and back it with something reflective, the gem winds up turning that color and sparkling. It’s basically how they make colored Rhinestones. As you can see, I mounted the rope around the wire for stiffness and shaping. I used left-over dessicant tubes from one of my medications, cut in half, as the end caps. The tube is just a placeholder at this stage, since  the one I’d glued together out of the 2-liter soda bottle was still in the clamps.
I’ve sawed off the base of the 90 degree bend, and am using it as an end-cap for the main barrel-tube. The trigger now has the knob on its end – for an up-build, I’d put some kind of knurled bead in there.

Jinx Zapper day 5
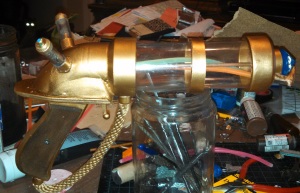
Day 5, about halfway through the workday (I took a break and took some photos). I’m test-fitting the butt-plate and the 1.5″ circular wooden plates that will hold the barrel-tube in place. The grip-plates are now stained and screwed in place, and the plastic parts and knuckle-guard are painted.

Jinx Zapper Day 6
Day 5, Final (I took this on Day 6, before I started work, hence the title). The second iteration of the vacuum tubes is in place (they failed spectacularly as well). I’ve puttied the sides of the receiver and mounted the muzzle furniture: the electrical tape is simply holding the main body of the barrel in place as the glue dries. At this point, I had also dropped rubber to start a mold of the prong I sculpted on day 1.

Jinx Zapper Final 1

Jinx Zapper Final 2
Day 6
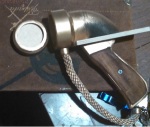
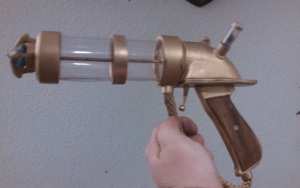
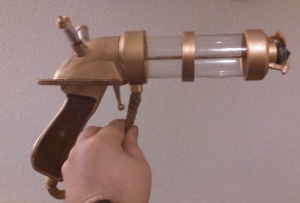
, The “finished” Zapper without glowsticks installed. I’ve added a friction-fit center “strap” on the barrel. The copper tube though the center adds rigidity as well as serving as a conduit for the eventual lights & sounds conversion I intend to do. There are plastic spacers installed in the breech and rear of the muzzle that center the tube and have holes for glowsticks, my interim lighting solution.
The new, and final, vacuum tubes are based on short sections of copper tube, paperclip wire, wire mesh netting, and one-shot casts of found objects.
The head of the trigger guard forms a pin locking the barrel assembly in place; it can be rotated 15 degrees for maintenance or replacing the glowsticks.
The trigger itself is rigged on a return spring and wired to a simple detent switch for electrification. There is a slot for a battery pack immediately above it inside the breech housing. The grip and breech are screwed together, and the vac tubes will be screwed on as well once I rig the electric lighting.

The final product (for now)

Jinx Zapper final - Internals with flash Jinx Zapper Light Test
Top: unlighted. Bottom: a lighting test with cheap glow-bracelets.

Future Plans:
Electrify prop with flashing lights: not sure I can get a good sound rig inside it without undue expense. The vac tubes, barrel tubes, and gem will go from a steady, light-blue glow when on, to bright flashing blue-white when the trigger is pulled.
I’m also going to get a $5 ice-maker coolant hose to replace the interim rope-and-dessicant guard, and move the grip out and down slightly while sculpting the floorplate of the breech for better handling characteristics.

I Has a Pastebin (Historical Inspiration)

[Obligate apology for being offline for a couple weeks]

First off, Medievalists.net has a feature on a recently-excavated medieval fortress city in Salisbury (abandoned due to some king vs. Church shenannigans in the 14th century, so it’s preserved quite well – unlike most medieval cities). The aerial photography makes the layout of the city itself visible, and the cathedral and keep’s floorplan are even clearer. The article is here.

One of the cool things about the internet has always been the way it gives you access to things you could never see normally. Unfortunately, it takes a hell of a lot of work to find what you need. So.. I’ve spent most of the last month researching military drill, naval tactics, and clothing construction in the 1600s (with some branching into the 1700s). I’m collecting a link library of high-quality scans of various primary sources, mostly drill-books and a few strategic works, to help out other wargamers and DMs get a feel for the military of various historical periods. Even if you’re just a history buff, they provide some valuable context on the lives of soldiers. It’s living temporarily in this pastebin.

Yes, I know the list of historical conflicts is incomplete and Eurocentric. I’m also using the most common American name for the conflicts to reduce confusion on my end, which will no doubt give someone a severe case of butthurt.

Eh.

Anyway, right now I’m busy cross-referencing a bunch of books on Ottoman drill and military structure for a personal project (maybe a publishable one!). It’s a bitch sorting out the truth from the lies, self-aggrandisment, and general panic that most Europeans were dealing with at the time (the late Renaissance/Early Modern period). If I can find reliable primaries, they’re next in line for the library, then it’s time for screenshots and organizing an actual website for this.

Mohammad_Naib_Sharif_in_Kabul

Fast, cheap Flightpath proxy dials (Attack Wing, X-Wing)

So, the biggest and most irritating barrier to making your own ships or proxying in the Flightpath system is the maneuver dials. I have a whole shitload of ships that will likely never get a release, not to mention a bunch of Clix-Trek ships I bought for parts or other wargames. So, as I was sculpting my 1:1200 K’Vort Bird of prey this evening, my eye fell on a sad, abandoned Clix-trek base, and something clicked into place (if you’ll pardon the pun)..

Note: this tutorial does not include making “ship chips”/bases, nor making custom cards. Check the Boardgamegeek or afewmaneuvers sites for that. And for the love of pants, don’t try to drag these into an OP event or some such stupid shit.

Warning: This involves sharp things. You could get hurt. Be careful. Now you can’t sue. Have a nice day.

Materials:
One two-inch “Clix” dial (needs to be the big ones with the secondary dial boxes, which I know they made for Mechwarrior and Crimson Skies Clix). Sadly, Clix-Trek bases only have 12 “slots” for maneuvers, whereas the large-format ones have the necessary 18. You can pick up minis from the Mechwarrior game for about a buck.
Colored paper (I used some 30-bond 3×5 cards I had lying around, since they came in faction colors).
Red, white or silver, black, and green pens. It helps if  the black is a small fiber-tipped micro pen. If you’re using black paper, you >must< use paint pens for this.
Craft knife
Compass cutter (I got mine from Daiso for $1.50)
Sandpaper or a sanding sponge.
Roll of cheapy cellophane tape.

Steps below the cut.
(more…)

TotBWC project update

Made a little more progress, now that I’ve got enough wherewithal to stay focused on one thing for more than 5 minutes. I’m still not even up to standing for more than 5 minutes, let alone the walk to Gabi’s from the bus stop, so live-fire tests at the LGS have been postponed (again..). Going to test out a couple scenarios with my brother while he’s here, though.

Here are the current revised force lists for the scenarios listed below (I’m still writing them up in the new scenario style, which will be coming up shortly. I hope.)
Scenarios with simple map/rule revisions:
“Leave No Survivors”
“Ghost Unit”
“Last Line of Defense”
(Hoff scenario IV)
(The remaining Hoff scenarios are getting repurposed into a Chaos Campaign tree)

“The Lady and the Tiger”
Special Rules: The weather is a Heavy Snowfall, increasing the difficulty of all piloting and gunnery rolls by 1. All ‘Mechs sink an additional point of heat. Starting on Turn 15, piloting skill rolls increase by 1, and all hexes cost +1 MP due to snow buildup; in addition, all units sink an additional point of heat each turn. All Water hexes are solid Ice. Forced Withdrawal is in effect.

Defender: The Black Widow Company (Total BV: Just shy of 16,000)
(Roll 1d6 on turn 4; on a 1-3, the Fire lance arrives: on a 4-6, the Scout lance. The remaining Lance arrives on Turn 7)
The Black Widow Command Lance must deploy within 4 hexes of the center of their Home Edge; all of their reinforcements enter from the opposite edge (flanking units returning to envelop the Killers).

Attacker: Santander’s Killers, Tregarth’s Company (Total BV: 11,726)
Command Lance: Cpt. Tregarth: Untouched WHM-6R*, Veteran Skills. TDR-5S (18 RT armor, 12 sinks, 7 CT(r) armor) (Veteran skills). WVR-6R (15 armor, LT). Warrior Larsen: GRF-1N (costs 2MP/hexside to turn)
Scout Lance: PHX-1 * (Double all movement heat, 5 HD armor, Veteran), STG-3R (gyro hit), STG-3R (Heat sinks reduced to 8), LCT-1V (heat sinks reduced to 6)
Fire Lance: VLK-QA* (Veteran, malfing Medium Laser), GRF-1N (10 LRM-10 ammo left, down to 10 sinks), SHD-2D (Gunnery 6 due to FCS damage), PNT-9R (all rear armor reduced to 2)
The Killers are in a search formation, struggling to overcome the blizzard, and all lance members must deploy within 2 hexes of their lance leader (marked with a * above). All lance leaders must be within 3 hexes of the center hex(es) of the map. Their Home Edge lies opposite to the Widow’s

Playtest notes:
I increased the delay on the reinforcements to give the Killers a little more of a chance; they wind up out-BV’d in the original scenario when half of the Widow’s Scout Lance walks onto the board, and basically outnumbered 2:1 by turn 5. It’s straight-up not enough time to even engage, let alone do any damage, for such a light force. With an objective of “kill everything, accept no substitutes”, it’s disgustingly unfair.
The overall Killers force was drastically increased; I like the paint scheme, so this is an excuse to make a company of pirates with a fairly reasonable force. I’m also going to do a personality model for the Death’s Head Raiders Victor mentioned in 3025.
I’ve run this one twice so far in its current incarnation. Still working on the map layout, but the Widow player can still win handily IF they use the weather to their advantage. While the Killers have more jumping units, the Widows have better gunnery on average and far more close-combat firepower. The cold weather at least partially compensates for the ratty ‘Mechs on the Killer’s side, and it is possible to inflict very serious damage on the Widows very quickly if they get sloppy. In particular, if Nasty K and MacLaren overheat too soon, they can be coursed and slaughtered before the Widow’s reinforcements arrive. The Killers’ player, however, must be extremely careful not to let his faster units string out and allow his defeat in detail. Finally, loading Infernos into the Shadow Hawk or Wolverine can allow some interesting tactics with Mud. Or the iced-over water hexes on the map…

“The Bounty Hunter”
Stillin the early testing stage; the assassination objectives make this one hilarious, but the Haseks had a dangerous BV advantage in the original scenario. On my first play-through, however, the Haseks literally lost 2 of their lights on turn 1 to breach checks and another to a failed PSR, badly unbalancing the scenario. I’m thinking of making some of the Hasek warriors have at least one Veteran skill, especially the Valk pilots hiding in the pools on his lawn – who will desperately need higher piloting skills with the way water works now compared to the BattleDroids rules. I may also down-weight some of the bodyguard lance.
This requires a custom map, which I’ll upload in its final form; this winds up being a clusterfuck pretty fast on the original 2×1 map. Especially with the walls and other elements restricting mobility.
TRO 3025 notes that the Haseks have “replaced all ‘Mechs in their Light and Fire lances” with Valkyries. With that in mind, the current test force:
The Bounty Hunter: MAD-BH’15 (Elite), SHD-2H, SHD-2H.  (6428 BV assuming elite/vet/vet)
Sixth Syrtis Fusiliers: (Duke Hasek’s personal Guard) [8,947 BV]
Command lance: MAD-3D or WHM-6D (The funnier option is the MAD, since it’s Michael’s personal ride), CRD-3D, RFL-3N, RFL-4D. [5737 BV, assuming 3/3 MAD-3D or WHM-6D – both have essentially identical BVs]
Second Lance: PHX-1, 3x VLK-QA (3,210 BV) or 4x VLK-QA [2892 BV]

This leaves “Lady Sings the Blues”, “Queen’s Gambit”, “Scavenger Hunt”, “Spider Trap”, “Dawn Patrol”, “Fog of War”, and “Lady’s Man”.

Folio update # whatever.

As per usual, work has devoured the last few days of the month. On the bright side, that left me with a couple hundred unexpected bucks, so there’s that. Probably wind up spending it on bills, sed, vitam est.
Anyway, spent my evenings and breaks reading up on the witch-panics in North America, along with editing the folio. I’m just now finishing the formatting/rewording/art choices for the third-level spells, and it’s pushing 100 B5 pages. Open Content + illustrated with public-domain woodcuts (largely Johannes Gerts’ Northern Gods with a side of anonymous fashion pics) = the proverbial win, I believe. I’m also listing the names of the Lamentations spells that aren’t OC in the indices with source links so you can at least hunt them up. I need to check with Mr Raggi at some point to verify exactly what’s open and what’s PI elsewhere, but that’s a project for next month.

On that note – Sakuracon is in mid-April, and I’m also hitting up Emerald City Comicon (more Trek actors than you can shake a stick at, plus custom fantasy legos? I’m there). Literally nothing is going to get done on the gaming front before I discharge my rather extensive responsibilities to the con, so if I don’t have this thing uploaded by Sunday next it’s probably not going to go up until after Easter. All the more motivation to finish now, eh?

Ahh, Nerves. (Miniatures)

I mentioned my broken hand earlier. It’s still giving me some trouble, but I’m back up to painting. Now I just need to get 3 months of dust off my brush and gear up for my Battlecry bucket. And that sexy, sexy MAC II.
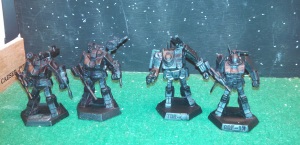
I built a test lightbox today (although it’s pretty freaking ghetto at the moment..) and decided to test it with some of my old minis.

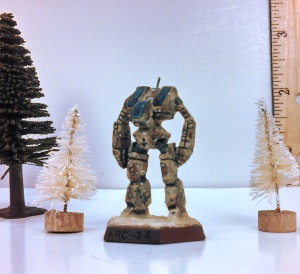
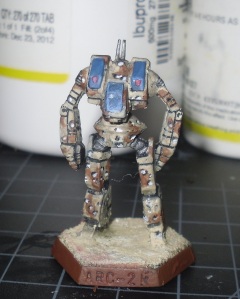
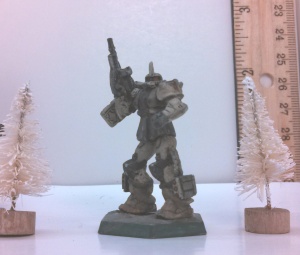
1-285 Archer-Spartan - Desert Camo - FrontWell.. maybe not perfect, but the top one was with a cell phone and the bottom one was with my now inexplicably-busted camera. In macro mode. DC ARC 21-400 Zaku II-J - Asian Theater - Front 1-400 Zaku II-J - Asian Theater - SideIMG_20130623_244433_156On the other hand, this shit is comparatively gorgeous. Now I need to fix my camera and start flocking a box bottom.

In other news, I’ve been working and binding books for a couple people on my Christmas list. I’m teaching myself to blind-stamp, which is rather a lot of fun. More on that as it develops.

Folio project progress

Finished the first part of the Folio, adding and cleaning up all the spells from the original contest and some other stuff. Did you know that Lamentations has nearly 80 first-level spells, not counting my own?
Now I’m teaching myself to use InDesign to see if I can print it up in signatures or I’m going to have to do this the hard way again. I’ve reformatted the pages, going through on another editing pass before I start adding in all the Open Content stuff from the R&M .pdf.
Folio 2
Finally starting to look good.

Now back to cleaning my library and working on my next post (it’s pontificating about Treasure and RPG philosophy!).

Craft Fair Aftermath

Didn’t manage to sell my book, but the wife sold off essentially her entire inventory, and I used some calligraphy to barter for goods. Then we got free bookcases on the way home, so hey. $60.

The finished product

The finished product

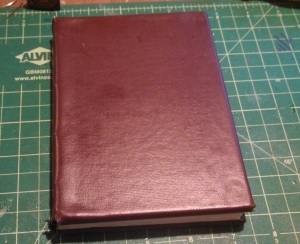
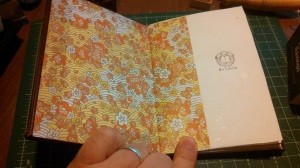
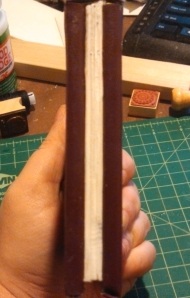
IMG_20131204_080850_149 IMG_20131204_080916_511Vinyl cover, hemp thread, and Japanese rice endpapers. Not bad for a first effort, I think.

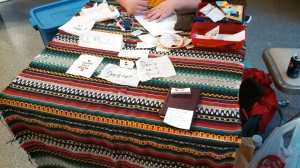
IMG_20131204_160256_118Our table, after the stampeding hordes made off with all our finished offensive cross-stitch. I embroidered “be a dick” on the Wheaton’s Law patch, which I found somewhat ironic.
IMG_20131204_160317_425My wife briefly abandoned me at the table.
In the Student activities building of an extremely progressive college.
With gigantic, framed cross-stitches of an uncomplimentary Saxon word for a latrine and/or female genitals, of a short tube for the conveyance of fluids, designatory terms for female dogs, and various other “helpful” things.
I instantly became the Gingery White Male Oppressor.
The sign deflected most of the filthy stares once people actually read it..

The highlight was the aged Yiddish woman who bought all the dirty words on the table and snapped up the rest as fast as we could sew them.

I have made an art (project)

IMG_20131204_031023_332 Glue’s still setting but she looks darned good if I say so myself. Will put the final touches on it tomorrow morning, and case the other two text blocks I’ve finished. With any luck, this might be my second project to actually break even!