Model Review: 1:288 (6mm) Eastern Express Antonov AN-71 “Madcap” AWACS

Summary:
The EE Antonov AN-71 is a fun, quick little build that will look fine as a gaming piece. Probably not the best overall choice for a “serious” micro-mini modeler, who will be screaming and flinging it out the window within minutes. 1:288/6mm scale makes it compatible with quite a few wargames, including Micro Armor, Fistful of TOWs, Battletech, and Robotech RPG Tactics. The limited historical deployment of this particular aircraft will hurt its utility for historical gamers, but other models in the series would likely serve them much better.
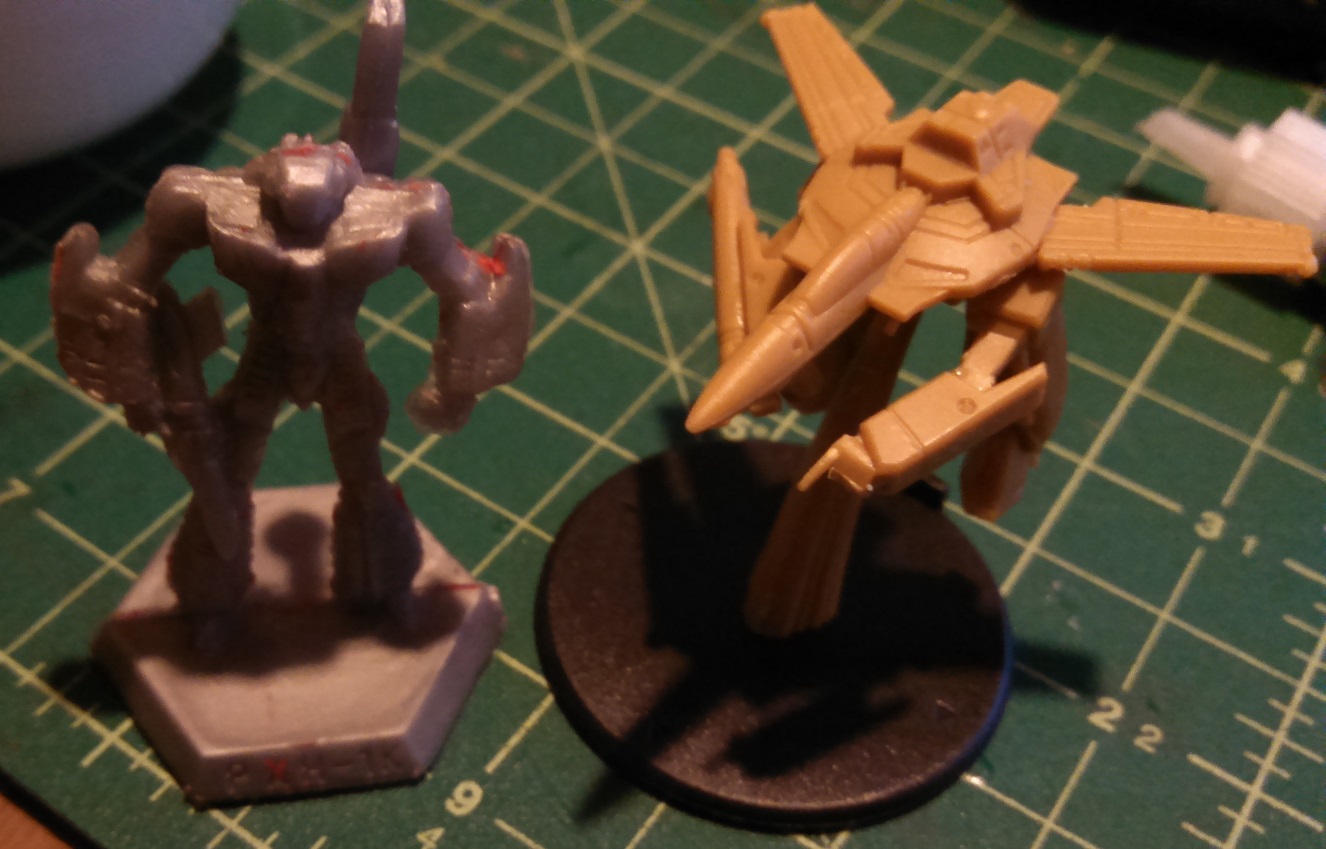
For Robotech Tactics modelers, the AN-71 is also an excellent base for an alternate version of the ES-11D “Cat’s Eye” recon – one of the guys on the Robotech Tactics Facebook group did up a conversion you can see here if you’re a group member.

Background:
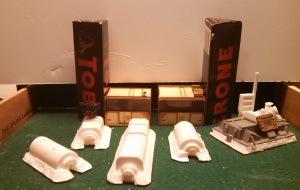
First off – a little history. In 1984-ish, the Antonov company put together a bid for a new AWACS version of the AN-72 light transport airframe (NATO callsign “COALER”). It was intended to vector in ground-attack forces at the tactical level (taking the load off of the larger “MAINSTAY” and “MOSS”, which were busy handling strategic responses and combat air patrol), while taking advantage of the AN-72 airframe’s ability to make use of short, poor-quality runways and improvised airfields. While loosely equivalent to the role of an E2-C Hawkeye in USN service, the AN-71 was supposed to be a land-based design (the naval role was supposed to be taken by the Yakolev YAK-44, which never surfaced).  NATO assigned the bird the reporting name “MADCAP” after its first flight in 1985. Unfortunately, the USSR only ever made three AN-71 airframes before the economic collapses of 1986-88 killed the program. One of those three prototypes was shipped off to the Ukraine for their new Air and Space museum while they were in the process of seceding from the SSSR, which is why this particular model was originally Ukraininan.The Eastern Express company put out a series of models based on the Museum’s holdings, all nominally in 1:288 scale. Toko seems to have put out a version of the series as well, and you can find a box in the US from Imex (I got mine on the ‘bay for $4, so always check your supplier..)

The AN-71 herself is pretty unique – a STOL design that uses engine exhaust to increase lift over the wings. Unfortunately this design, while efficient, tends to be damned noisy for the poor saps inside the cargo bay, but hey. Whatcha gonna do? *(cancel it if you’re Boeing, of course. Keep using it for fifty-plus years if you’re a Russkie..)

Surviving AN-71 on display in the Ukraine

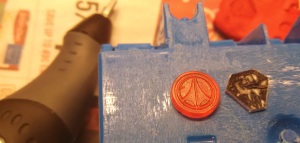
The Good: Simple, clean instructions. Good decals, although I have no need for them. Generally decent fit and polish on the kit.
The Bad: Lots and lots of flash on frame “A”. It cleaned up well after a quick pass with an emery board. Some gates on detail elements distorted the radome and tail. Shallow detail cuts had to be sharpened.
The Ugly: Does not include any parts to make closed landing gear bays. The engine mounting surfaces were poorly-designed, and the wing overall required a lot of work to mount.
Full model build/review under the cut. My apologies for the poor quality of a couple of the images -I plead being sick as hell and having a shit phone.

(more…)

Sculpting again – Robotech Tactics

I was annoyed by the lack of Malcontent command chips, so I started sculpting my own this afternoon. So far, I’ve got about 20-30 minutes of work into it. I freehanded the base shape onto paper using a UEDF chip as a size comparison, sketched the design onto it loosely with a Micron .005, and then freehanded from that with my engraver (picked on up free from one of the Makerspace guys who was ditching it after getting a laser engraver).

After cutting the base chip and freehanding the Malcontent logo on there with the Dremel - ~5m.

After cutting the base chip and freehanding the Malcontent logo on there with the Dremel – ~5m.

Next, I mixed a tiny amount of Green Stuff and worked it onto the design.
Step three - 10 MinTook about 10 minutes so far. I’m pretty proud of the detail on the Valkyrie tail, especially since it’s less than 1mm tall.

Now I gotta wait until after my volunteering shift at the local film society to throw another layer of GS on there, but it’s already looking damned good. I’m probably gonna be in shape to drop rubber on these by the time I can afford to buy more. Eventual plan is to cast off a pair of masters, sand the backs down slightly, and then glue them together and install a thin rim instead of trying to do this thing double-sided. All told, should take me about an hour’s actual work to get a mold going, maybe another 40 minutes total to set up a full mass-production rig.
Not, of course, that I’d MP these. But Jesus, Palladium, it’d take a pro sculptor less than a fucking day to set this up and GHQ could be pumping them out by the thousands in less than a week. Hell, you already have masters for the UEDF and Zent chips, put them under some rubber and give us enough to actually play with…

Airbase Toblerone: Part one (Battletech, Robotech Tactics)

As promised (two weeks ago -_-;;) here’s some WiP shots of the terrain I’ve been working on. I got a fire lit back under me while working in the local makerspace with one of the guys on some really basic foam-cork stuff, and started back up on one of my long-term stalled projects; a fully-fleshed out 6mm Drop Port and/or HPG station for Battletech and Robotech Tactics. The wall and command bunker entrance here come from that session.

Ha Shi Dao complex front

“But what’s the ‘Mech, Doc?” Come back tomorrow for more..

IMG_20160605_213655_604 They’re loosely based on the Hai Shi Dao defense emplacements from Steel Battalion (Christ I love that game), and depicted as shelled and partially knocked-out. The intact emplacement on the left in the bottom pic is going to be getting a twin-AC/10 emplacement later. I really wanted to get a kind of “churned and barraged” feel, so I referenced a couple paintings of WWI battlefields for the ground colors on the main emplacement. You can also see a partly-overgrown crater with bits of a tree in the foreground of the piece.

Airbase step 2

For the main buildings, I rooted out one of my old ERTL Space Shuttle kits for the EuroLab components and the  GPS satellite payloads (I’m converting the Shuttles themselves into mini-Leopards, but that’s another post) to make the Quonset huts and barracks. The Command Center is a fighting deck from a Warhammer 40k Basilisk that I’d converted to a direct-fire SP gun, along with a few resin scrap components and a Cardassian comm screen from an old Star Trek figure. All are mounted on 1/8″ foamcore. The beveling was done roughly with a sharp hobby knife.
The gate towers are each made from half a Toblerone package (which I’ve been wanting to do for ages), scrap from the “Storage Units” that I got from the Burn In Designs kickstarter as ‘Mech hangars, and bits from a trashed Mechwarrior DA figure I used for parts on an N-scale kitbash. The bay windows are simply cut from mini blisters. These are still waiting on internal floors for the third deck and some catwalks against the back wall, as well as armament for the towers. I’m focusing on the plastic buildings at the moment, so I can get as much as possible put away before doing any more heavy conversion lifting.

Airbase progress 10 Aug 2016Current status after base-coating.
I sealed the foamcore with PVA glue, then added sand and flocking with another couple coats of glue before spray-coating. No melting, so I must have done it well enough..
You may remember the turrets here from my casting tutorials (link to first post here). I’ve since converted a few of them to laser and missile turrets, as well as a massive mini-missile rack and a “mechaturm” based on the old German Panzerturms. The turret torso is from one of my own “Shortbow” custom FrankenMechs. The readout below is just for the “factory” option, since making a Franken proper is a massive pain in the ass.

Basically just slap an LRM-20 in each arm instead of those shitter ACs and you get a startlingly competent back-line fire-support unit.

Basically just slap an LRM-20 in each arm instead of those shitter ACs and you get a startlingly competent back-line fire-support unit. Enough sinks to fight, ammo for days, and no armor to speak of. It’s perfect!


Remaining for this project: Doll up the Burn In Designs modules and the Toblerone Towers, prep the power center and fuel farm (I have the parts, just haven’t put them together) and make a blast shield for droppers.

Quick Robotech Tactics update

Palladium finally put up the paper minis they’ve been promising for literally over a year on Drivethru RPG.

There are still problems with the assembly instructions, but those are also now up for every unit in the game instead of just a couple.  I’m hoping to find the time to print a few up and see how they look in a few, but right now I’m more interested in another project. More on that in a bit.

General update (BT, LotFP, RL)

Been away for a while, and while I’ve been getting a lot done in meatspace I just haven’t had the right kind of energy or focus for extensive writing these last few moons (I’ve still posted a bit on tumblr and the LotFP G+ groups, just not enough material/fucks to hack at the KB here for a while) . Not to mention, I haven’t been getting much if any table time in (although that’s changing), so there really hasn’t been much to write about.
Oh, and my fourth wedding anniversary is tomorrow.
So.. general update time.


On the blog front:
Went back and fixed some broken links as well as doing minor edits to a couple of posts as playtesting shakes out. Notably, Camo Specs Online (the BT color reference site) went down and had to completely restructure, so I had to fix all those links. I bumped all my drafts to the top of the queue to see what’s salvageable.
I’m also going to be revising the sidebar links and adding a few new cool people to the list, as well as removing dead sites. If you happen to see something let me know.

Kickstarter updates:
Got my copies of World of the Lost, Towers Two, and England Upturn’d. All are amusing in their own ways. Reviews as can be arsed.

Robotech RPG Tactics continues to be a mass clusterfucking event, with Palladium now weeping crocodile tears about how hard it is to make new sprue layouts while promising us the same shit they have been since Wayne stopped talking last year. Kevin got hit by a truck and people were celebrating in the comments because at least the header on the Pallladium updates changed for a week. I need to get a few more items before continuing work on the build reviews for the Archer/Spartan, Warhammer/Tomahawk, and Longbow/Phalanx.

The Skyway Project buildings are fucking awesome.

Gameplay updates:
Got my friend A. into BattleTech, and we’ve done a couple of training fights now as well as dicking around watching ’70s and ’80s Real Robot anime. Much fun was had, and BATTLETECH occurred

Ran a picaresque game with Scenic Dunnsmouth for my folks on the 4th, using the characters from the Thanksgiving game as well as a couple new rolls. It got cut off right after a Big Reveal ™, but at a place that allows adding or subtracting characters as necessary. Play report shortly, along with house rules in use.

Meatspace projects: (project logs in line for several of these)
I’ve successfully sorted nearly 20 years’ worth of loose papers – including DM notes, half-finished projects, dead campaigns, and reference files. All of my gaming books are likewise sorted. I built new display shelves for my desk out of a deceased bookcase, and I’ve cut the panels for a chemical and paint storage rack as well.

One of my friends bought a folk-banjo at an artist’s garage sale, and I’m pretty sure I can do one. So I’ve salvaged most of the materials and gotten some tools together; just need strings and elements for the neck. I’ll be blogging my progress as it goes.

Finished one large piece of 6mm terrain. It’s a busted wall based on the shore defenses in Ha Shih Dao in the first missions of Steel Battalion. I also mounted and prepped a half-dozen California Base Turrets, along with a surprise FrankenMech Mechaturm, a massive wall, an assortment of bunkered buildings based on the ERTL Space Shuttle labs and sattelites, and some Quonset huts.

Painted and/or prepped a huge number of models for the Black Widow project. Photos coming this afternoon.

Bought a hardcopy of The Sinister Secret of Saltmarsh and soft-copies of various BT books (IntOps, CampOps, RS:Industrials, CM:Mercs).

I’ve built up some post-apoc minis for This is Not a Test, and grabbed an assortment of terrain. I also organized and repaired/re-stored all my modular terrain systems. I have a shitload of terrain.

Finished another few props for the local theater folks, including a Kodak Brownie 1880’s model and a couple of books.

Joined the local makerspace, and I’m likely going to be teaching a class on scratch-making half-timbred buildings for Mordheim and the like. Watch this space for deets.

Thanks for putting up with my shit. Have a shiny.

Thanks for putting up with my shit. Have a shiny.

Robotech RPG Tactics, Wave I – Part III (It’s Destroid Time, With Your Friend, the Defender)

Finally, we get into the home stretch of my Wave I reviews. The Destroids are the models I bought the most of, for various battletech reasons.

Edit: Palladium Books has released updated assembly instructions for the Defender (and other units), which you can find on DrivethruRPG (here) for free.
Previous Posts: Part I, Part II
Next Posts:
I started a great photo-set with my sprues of Defenders months ago. I just burned out on dealing with the damned things when I started my first Phalanx. Wound up throwing the entire mess of Destroids into a box for a couple of months in sheer frustration. To be frank, I was getting pissed just looking at the models. That’s a very bad place to be as a reviewer, and a worse one as a hobbyist. So, yeah.

That’s really about half the review right there.
`
Generally speaking, the Destroid models are more poseable than the Valkyries or Glaug. There’s also no less Procrustean modeling, so you aren’t specifically forced to keep half the weapons in a fixed position. The joint layout makes magnetizing the arms and weapons very easy, which means you can even repose during a game if you want.
Unfortunately, they’ve also got insanely high part counts, with unsightly seams everywhere on most of the models. And, though the feet on the Defender, Tomahawk, and Phalanx are essentially identical, each sprue uses a slightly different and incompatible connection method for the ankle joint, reducing your posing options.

We’ll start off with the Defenders, because I actually have a full photoshoot prepped and ready to go (and I don’t want to keep this series on hold for the week (good Lord I was naive there) or more that prepping the other three will take)


Defender:


Defender Sprue obverse

Click to embiggen for assembly notes

Reverse of sprue, showing arm keying.

Reverse of sprue, showing arm keying.

Issues:
Three of the four legs are missing at least one detail. Only one is complete. In addition, two of the legs have gates on top of surface detail. You’d think, with the amount of copy-pasting going on elsewhere, that the legs would at least be identical..

Note that the leg on the right has only two strips, while the left side has four. Another is completely missing this detail, and a third has it damaged by a gate AND is missing the vent details on the side

Note that the leg on the right has only two strips, while the left side has four.
Another is completely missing this detail, and a third has it damaged by a gate AND is missing the vent details on the side

The body is a five-part model. It has several ugly, prominent seams that must be cleaned or filled, and leave noticeable gaps in the finished model. The searchlights on my models were also miscast, with mold lines and underflow on all four side torsos.

Gapping in the torso, hips, and arms

Gapping in the torso, hips, and arms. Torso searchlight miscasts.

The guns have extremely thin barrels, making extracting them without damage very difficult. Cut the bases of the gun first with clippers, then slowly cut off the barrels with a very sharp knife or saw. Preferably, add some padding behind them.
The connecting peg on the hips is wider than the hole in the torso, and must be carefully filed down to allow the model to mate properly.
The hip joint mounts on the legs force them into very specific angles, but can be easily (if carefully) modified to allow other positions.
There is no mounting point for a Command Destroid modification on the Defender, and the only position in which it “fits” interferes with both the arm placement and the radar sail. I have a functioning conversion that involves cutting down the piece into three parts and re-mounting them in the radar sail area.

Conversion prep instructions and diagram

Conversion prep instructions and diagram

Once the parts are cut, you can mount the search radar on the side of one of the ammo bins, or up over the shoulder/gun area. I cut off the top of the right-hand bin and hard-mounted it to the torso, however, and I think it came out pretty well.
Flip around the comms package, and cut it to fit the normal radar sail mount. It won’t take too much effort, and it looks pretty good up there.

The finished product

The finished product

Good Points:
The hard, flexible plastic makes the slender guns and radar blade surprisingly resilient once they’re off the sprue. The Defender’s posing is much more flexible than most of the other models in the line. There are points of articulation at the arms, legs, radar, and torso angle – all tweakable with minimum effort.

Number of Components
:

Twenty. Body is six parts alone, the legs and arms are three each, and the hips are two-parters.

Assembly Time:
Prep cutting took 15 minutes, not counting the time required to pin and re-glue an o.7mm gun barrel. Torso and hips took about 8 minutes to green-stuff and align, including filing and prefits. Overall, the two models took about 40 minutes to assemble, plus 8 hours of Green Stuff drying time. With a sharp, very slender pair of diagonal cutters the pair would probably take ~30 minutes.


Vigilante One, reporting for duty!

Vigilante One, reporting for duty!

Update: Robotech RPG Tactics corrections

According to the email I got from Palladium, their omission of various cards (see link) from the boxed set was deliberate. They have, however, made those cards and the missing Malcontent and Artillery cards available on DrivethruRPG for free. They’ll also be putting them up on their website “soon”.

They’re also working to make the Orguss Destroids and fighters slightly more builder-friendly, which is promising on the “later units” front.

Quick personal update/USN Squadron Reference dump (Robotech Tactics, Battletech)

Spent all day yesterday and a good part of today painting up my entry into the most recent Iron Painter contest on the Battletech forums. The deadline is Dec. 1st, in case anyone out there is watching and wanting to play.
This weekend is the big Customer Appreciation sale at Olympic Cards and Comics, so I limped over there and grabbed assorted Christmas gifts for the folks (and magnets, as well..).

I’ve been toying with the idea of painting up my Valks as some of my old squadrons from CAG-9, partly to give me a reason to finish my cruise jacket and use up all my patches. Since I was combat-deployed during the time-frame of both the Global Wars and the First Robotech War, it stands to reason that some of the squadrons active in the era might have survived and folded into the UEDF. Plus, we know the Screwtops and the Top Hatters survived into the Robotech war by the markings on some of the Valkyries in background scenes. Hell, Skull Squadron is blatantly the Jolly Rogers.

Seriously Roy, get that thing on your back looked at.

As far as assigning them, I know the Golden Hawks are getting the VEF-1 squadron (that royal blue and gold screaming eagle looks amazing on a radome), and the Checkmates will be at least one of the Valk units (my main intercept squadron). I’m thinking, though, that some of the Attack squadrons should really be rocking Destroids, possibly one squadron per Destroid type. The Screwbirds would map well to Defenders or my Lancers, and the Black Knights would of course be rocking the Tomahawks. I know I’m going to have several units of Spartans and Phalanxes, so I may just set them up as the Blue Diamonds and Argonauts, and HS-8 as the Ghosts.

The Argo’s commander’s bird is damned sexy too. Tell me that wouldn’t look good on a Phalanx..

The other option, of course, is to use the funniest squadron names possible; the Fighting Redcocks (with whom I also deployed), the Red Rippers, the Puking Dogs..

Actually, this is a decent time to talk about squadron markings, in case you’ve ever been curious as to how they work. The Argo up there, for example, is marked “NH-200”, and belongs to squadron VFA-147.
The order of precedence is Air-wing/squadron/plane number. Each Air Wing has a 2-letter code, further broken down into “coast” (Atlantic = A, Pacific = N) and the wing’s unique letter. These are completely arbitrary, however, so all you need to know is that they don’t use the same letter twice. I’ll be using either “O” or “R” for “Orbital”.
The first number in the 3-digit designation is the squadron number in the Air Wing. Traditionally, the Intercept squadron(s) – the “fighters” – are squadrons 1– and 2–, the attack squadrons 3– and 4–, and the Electronic Attack and AWACS (Airborne warning and control) units get 5— and 6– respectively.
Thus, NG-400 is the leader of the 4th squadron in “Pacific Air Wing G”.
The Squadron’s call-numbers, meanwhile, tell you what kind of unit it is. So “VFA” means “Fixed-wing” (V) Fighter/Attack (FA) Squadron. “VAQ” is “Fixed-wing” (V), “Attack” (A), “Electronic” (Q), and so on.

So, how can you apply this to marking your units?
The Air Wing’s commander typically flies in 100 or 200, with his XO flying in the other of the two, or on his wing in 101/201. That’s where your VF-1S and/or VT-1D are most likely to be. Yes, it’s beyond me why they made the frigging Training variant a commander unit in RRPGTobotech, but whatever.
Destroid groups would likely have higher squadron numbers than Valkyries. I’m using “D” to re-designate them, so VFA-146 would become DA-146 if I loaded them into Spartans, while VMFA-314 (the “M” is for “Marines”) would become DMA-314.
The VEF-1A is technically a non-combat or support unit. Non-combat squadrons get numbered after the other, sexier ones get theirs, so something in the 6-7 range would be appropriate (2 Valk squadrons, plus 3-4 Destroid groups, and then the AWACS squadron).

Edit: Current marking scheme follows
UN Space Self Defense Force Veritech Combat Group 9, call number OH
Valkyrie units:
OH-1xx – VT-211 “Checkmates”  – VF-1R with VF-1D support
OH-2xx – VT-31, “Tomcatters” – VF-1A with VF-1S support
OH-3xx – VT-147 “Argonauts” – VF-1A with VF-1J support
OH-4xx – VT-146 “Blue Diamonds” – VF-1A with VF-1J support.
OH-5xx – VTAQ-138 “Yellowjackets”- VEF-1, no support. 5 aircraft.
OH-6xx – VAQ-112 “Golden Eagles” – Cats-Eye Recon, no support. 4 aircraft.
Destroid Units:
OH-7xx – DMA-314 “Black Knights” – Destroid Tomahawks and Spartans. Major William J. Smithson commanding.
OH-8xx – DS-22 – “Fighting Redcocks” – Destroid Defenders with Tomahawk support. “Ogre” Inman commanding
OH-9xx – DA-151 “Vigilantes” –  Destroid Phalanxes with Defender support.
Drone Units:
OH-0xx – UP-8 “Eightballers” – Ghost Drone Fighters with limited Lancer support.

(DS: Destroid Superiority/Anti-air)
(VTAQ: Veritech squadron, Spaceborne Early Warning/Electronic Attack)
(UP: Unmanned Patrol, wingless)
Units are split out by type now, which bumped up the VEF squadron.

Robotech RPG Tactics, Wave I – Part II (Problematic Models and their assembly, and Component Quality)

This is part 2 of a multi-part series
#1: Compatibility and Scaling
#3: Destroid Defender

In addition, Palladium addressed some of the concerns expressed in this post, including making some of the excluded cards and assembly instructions available on-line (though they’re still partially incorrect)
See the post here.

By way of preface, this was supposed to be a fluff post, and take maybe a couple hours to write while I worked up test models for the game, took pics of the sprues, and noted down the hard spots for a new modeller.

It’s been a sodding week, and I’m only covering the worst offenders so far; the Destroids are on hold until I can get some magnets.

The mini quality has been, hands-down, the most controversial part of the entire game to date. Is everything shit? No, not by any means.
But all three armies (Zentraedi, Malcontent, and UEDF) get the shaft on something. The Quel-Regult is by far the worst offender, with multiple parts that don’t fit, and a missing component (see below). The UEDF player, meanwhile, gets a bit screwed by having even more models to build than the Zen player – models which take almost three times as long to build out, and have significant problems of their own. The Malcontents? The boxed set doesn’t even contain any legal units for them.
And while some of the models are a bargain, the Zentraedi get hosed on a critical component of their army.

Full breakdown after the jump.
(more…)

Review: Robotech RPG Tactics, Wave 1 Part I (Compatibility, Scaling)

This is the first post in a multi-part series
#2: Valks and Zentradi
#3: The Destroid Defender

So, I’ve mentioned my kickstarting in the past. The Robotech RPG Tactics (neé Robotech Tactics..) kickstarter was one of my first. I’ve been following this glorious clusterfuck since it was a guy on BlogSpot with a dream and a good sculpting hand. Well, a year and a half after funding (and almost three years since it’s inception) I have my models. Was it worth the wait?
The Short version:
The Good: Holy shit the detail on the models. Extra Valkyrie parts galore. A well-polished book with a tight and portable rules system I’ve already been hacking for a few months.
The Bad: The model sprues are un-labeled, and there are warped parts and missing assembly information. The partially-incomplete rulebook makes it difficult to build a force without shuffling through a massive brick of differently-sized cards, and several rules are ambiguous.
The Ugly: Deliberately bad poseability. Poorly thought-out gates on the sprues damage detail on some models, and require extremely careful prep work. Then there’s Palladium Books’ behavior.

This is the first part of a series; a quick preview, concerned with model scaling – since its the question I get most often, from every quarter. I’m also writing specific reviews of the rules and the model components; this will include build-ups of the Wave I mecha models, and a discussion of the quality and fit issues – of which I’m sure you’ve already heard.

The question everyone wants to know:
What’s that? “Doc, will the models work in [the major mecha game..]?”
Yes and no, it depends on what you want out of them. First:

The Bugs:
A properly built-up Super VF-1A or -1S will definitely pass as a PHX-1 or a Pixie LAM. Modding an extra gun-pod will make you a PHX-3-series, though it will require green-stuffing. A straight-up VF-1A or -1S without the FAST-pack will make a pretty good PHX-1K.  Based on the scale shots I’ve seen so far, Crusaders shouldn’t be an issue either once the Armored Valkyrie boxes come out sometime next year.
What they won’t do is get you the shorty Bugs – Wasps, Valkyries, or Stingers.

Family Tree

Clockwise from the top: Unseen Pewter CRD-3R, WizKids PHX-5L, 3e Plastic WSP-1A, 3e Plastic STG-3R, 3e Plastic PHX-1, and a RRPGT VF-1J in the center.

Hark - A Grognard

Gervalk VF-1J, with a dismasted Pixie. Arms taken from the Battloid-mode sprue. The pegs are mounted in different areas on each model, but can be used in either mode with a bit of time and green stuff.

The Heavies: (What everyone wanted anyway)
In general, the Destroids are more compact and detailed than the Unseen metals, and much better than the plastics. While mine are still on the sprues, CampaignAnon from /btg/ was kind enough to give me permission to post these pictures of his initial work. Phalanx and Spartan photos to follow once I’ve had the time for a build-up. I also have a lead Unseen Longbow coming in in a few weeks, which will help comparisons considerably. Notably, the Spartan box includes the parts necessary to make an ARC-3K (the variant with a pair of Large Lasers), while the Phalanx box has both the standard “Barrel” arms and the nuclear “Derringer” arms seen in the last few episodes of Macross/Robotech, perfect for representing an Arrow IV system – or Thunderbolts.

Left: RRPGT models. Right: Metal Unseen. Images by CampaignAnon

Left: RRPGT models. Right: Metal Unseen. Images by CampaignAnon

The Glaug is far too large for Z-scale. I’d call it a trifle small for N-scale, if WizKids had ever actually attempted anything like a consistent scale in their efforts. It almost fits in with that weird half-scale the HQ Loki and Thor from the 25th anniversary box had, but even then is in its own little niche. The Glaug sprue also contains a Quel-Regult (a scout/EWACS variant of the standard Battlepod) and a Quel-Gulnau (salvage/recovery unit), which means that the boxed set will be pointless for a BT player unless you want an N-Scale Ostscout for some reason.

"L-

The Breakdown
If you’re primarily interested in buying the models to represent otherwise un-obtainable units, the Destroid and Super Valkyrie “add-on” packs will likely be your best bet. The current MSRP is $33/box for either a box with 2 Defenders and 2 Tomahawks, or a box of 2 Spartans and 2 Phalanxes.
This is about half the price of the 3e Plastic Unseen on auction sites, and the added detail and friendlier material make them very much worth it – especially for the Phalanx/Longbow (which is very hard to find, and never saw a plastic release) and the Rifleman/Defender (the Plastech model is especially ugly and intractable). Before you cough up, however, I recommend reading the modelling review. These are still, effectively, 1:144 models shrunk to 1:285 scale, and require a great deal of effort and build time.

Legal note: all images and trademarks not owned by me are used without permission, for the Fair Use purposes of review and discussion. No challenge is intended by their use. I neither represent nor have personal ties to Harmony Gold, Palladium Books, FASA, or Catalyst Games, nor any other interested party. I am not a party to FASA vs. Harmony Gold. Thank you for your time.

A Productive Day (Battletech, Sculpting WiP, rust reference photos)

Well, after fiddling with that pen, I felt the need for some sculpting. My long-running Longbow/Spartan project is one layer closer to completion, and I’ve begun taking a miscast Hunchback from my Battletech Intro Boxed Set and turning it into a “Swayback” variant – in this case, the twin LRM-10/quint Medium Laser HBK-4J. Click to embiggen all photos – the knife shots below are quite large for reference purposesLongbow WiP 08 Oct 2013 - Hunchback
Then I went out to make dinner. Turns out a bottle of vinegar-based salad dressing had overturned onto my carbon-steel meat cleaver.
You may know what acid does when exposed to good steel.
I had the presence of mind to photograph it, as this is pretty much what a good bloodstain that’s been ignored will do to a sword/cleaver/knife. Commentary in the captions

Left side of blade, with a quick wipe to remove the pooled vinegar.

Left side of blade, with a quick wipe to remove the pooled vinegar.

Note the grainy texture of the corrosion on the right side, and the ring of corrosion around a nearly untouched center at the top of the blade (if there’s no contact with oxygen, the blade can’t rust – that’s why you oil weapons)

Right side, again after a quick wipe

Right side, again after a quick wipe

This side didn’t get it nearly as bad. Again, though, notice the texturing and contours of the corrosion around the clean areas of the blade.
IMG_20131008_191945_515IMG_20131008_191936_898

Here’s the blade after a scrub with paper towels, but before I scoured and re-seasoned it. This is what hastily wiped-off blood would look like if you let it sit in a corner somewhere. Also, note the color changes as the oil scrub absorbed the majority of the “fresher” light orange oxides on the damaged parts of the blade. The corrosion’s almost black underneath, building though thicker browns to a powdery, newer orange.

Battletech Projects Update

I’ve been offline but not idle. The cough is still with me (whee) but the rest of it’s died back a lot.
First, the Longbow/Phalanx is progressing nicely. The legs are finished, I’m starting on the arms and finishing the last bits of the body (heat sinks, collar, and the drop-out reactor in the back of the torso). Click to embiggen the photos. Note that the spotlight is just blu-tacked on, I’ve got to build the mount for it and add the antennas.
Lonbow bash sculpt progress 6-5

I’ve resumed the Diesel Thunderbolt from TRO 3063 (see below).Fucking Canopians pt deuxIt’s very much my favorite ‘Mech from the project, both in appearance and sheer amusement value. I broke off the sculpt because I couldn’t get the armor plates right: now that I have the right tools, it should go much faster. I’m basing mine off an Unseen Thud, instead of the Jihad-era Reseen we used in the book art.

I’m insanely happy about this last one – I got permission from Alex Iglesias to sculpt up some of my favorite designs of his, the “unfucked protomechs”. He occasionally posts original designs and comics on /tg/, and these.. well, judge for yourself.
1360369596916
I’m making the Roc for sure, probably with swappable weapon mounts, and I’m seriously considering several others. I need to hone my skills more, but I finally have the tools and equipment. It’ll be nice for my Spirits to have the tools I want and not the horrid Chaffee designs.

I’ve Got to Admit, I’m Getting Better

Finally recovering from that bastard lung thing. It’s been nearly two weeks now.  Still got a lingering cough and still on meds for a while, but no pneumonia this time, Gratia Dei.

Anyway, on the gaming front. I bought me some robutts, as I mentioned earlier. Right now I’m going through the preview rules, presented videos, and various other crap to put together a better preview ruleset. They actually gave us enough to reconstruct most of the UEDF mecha, but were not so kind with the Zentraedi (alas). Final results will be posted elsewhere and linked from this post. Trying to get a couple multiplayer preview games together instead of just playing with myself (hurrhurrhurr). Been using my BT minis as proxies for full irony; the Citytech Locusts have the right height compared to the Stingers/Wasps and Destroids to work as Regults.